 Save to Pinterest
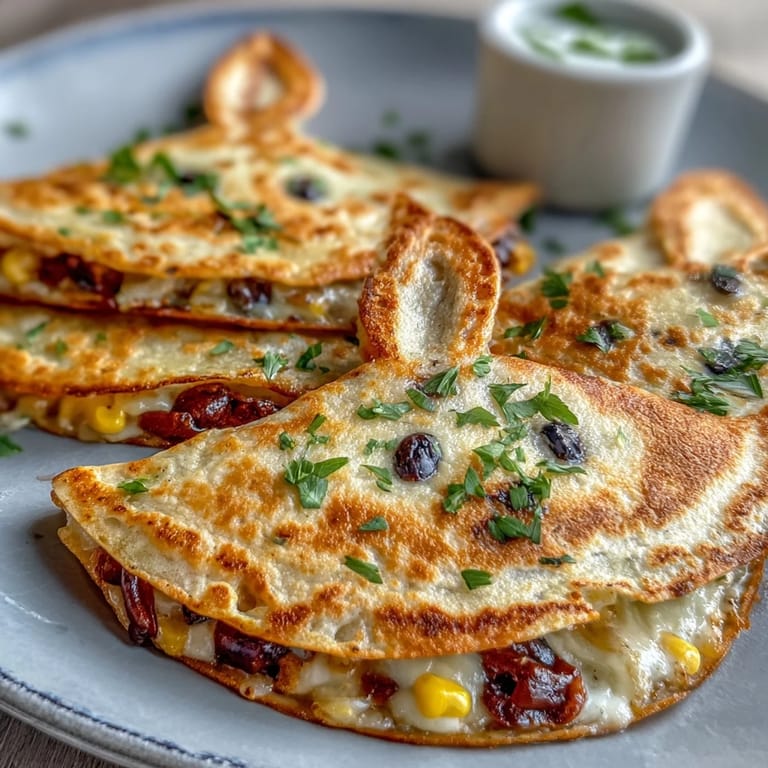
 My daughter showed up to school one morning clutching a printed bunny from her Easter craft project, and that's when it hit me—why not make something she could actually eat that looked just as festive? These bunny-shaped quesadillas came together almost by accident while I was rummaging through the kitchen on a Saturday afternoon, hunting for something that felt special without requiring hours of work. The moment I cut that first tortilla bunny with a cookie cutter, I knew I'd stumbled onto something the kids would go absolutely wild for. It's the kind of recipe that sneaks joy into lunchtime, turning an ordinary quesadilla into an edible craft project.
I made these for my nephew's Easter brunch last spring, and watching his face when he realized his lunch was actually a bunny sitting on his plate is a memory I'm never getting back. His little hands immediately wanted to decorate them himself, pressing olive eyes and carrot noses onto warm tortillas while giggling at how silly they looked. That's when I understood the real gift of this recipe—it's not just about feeding people, it's about giving them a moment where food becomes play.
Ingredients
- Large flour tortillas (6): Use the thinnest ones you can find so they crisp up nicely instead of chewy—thicker tortillas turn into leather when baked too long.
- Shredded cheddar cheese (1½ cups): The cheddar brings sharpness and color; it melts beautifully and holds everything together without getting greasy.
- Shredded mozzarella cheese (1 cup): Mozzarella is the stretchy glue that makes quesadillas satisfying; it melts smoothly and creates those golden patches.
- Diced bell peppers (½ cup): Red, yellow, or orange peppers add sweetness and crunch—I learned the hard way that green peppers can make the filling taste bitter by comparison.
- Sweet corn kernels (½ cup): Fresh or frozen corn works equally well and brings unexpected sweetness that kids love; drain canned corn carefully to avoid soggy filling.
- Unsalted butter (2 tablespoons, melted): This light brush creates that golden, crispy exterior that makes the whole thing feel restaurant-quality.
- Black olive slices (12): These become the eyes, and they're actually just there for decoration, so use the ones you love eating since you'll be popping a few while you work.
- Baby carrots (6): Each carrot becomes a nose—slice them into small rounds or cut them at an angle so they stick better to the warm cheese.
- Fresh parsley or cilantro sprigs (6): The whiskers are purely decorative but completely transform the playfulness of the finished bunny.
Tired of Takeout? 🥡
Get 10 meals you can make faster than delivery arrives. Seriously.
One email. No spam. Unsubscribe anytime.
Instructions
- Heat your oven and prep the stage:
- Preheat to 375°F and line your baking sheet with parchment paper so cleanup becomes someone else's problem. This temperature hits that sweet spot where cheese melts and tortillas turn crispy without burning the edges.
- Cut your bunny shapes:
- Using a bunny-shaped cookie cutter (or trace a template and use a sharp knife), cut 12 bunny shapes from your tortillas—you'll get about 2 per tortilla if you're efficient with your cuts. The knife should be sharp enough to cut clean through without dragging, or the edges will fray and look sad instead of cute.
- Build your quesadillas:
- Arrange half your bunnies on the prepared baking sheet and sprinkle them generously with the mixed cheeses, bell peppers, and corn, keeping the filling away from the very edges so nothing leaks out. Top each filling-covered bunny with another tortilla bunny, pressing gently to make sure everything sticks together.
- Brush and bake:
- Use a pastry brush to lightly coat the top of each bunny with melted butter—this is what creates that golden, crispy finish that looks almost professional. Pop them into the oven for 8 to 10 minutes, watching around the 7-minute mark because every oven runs a little differently.
- Decorate while they're warm:
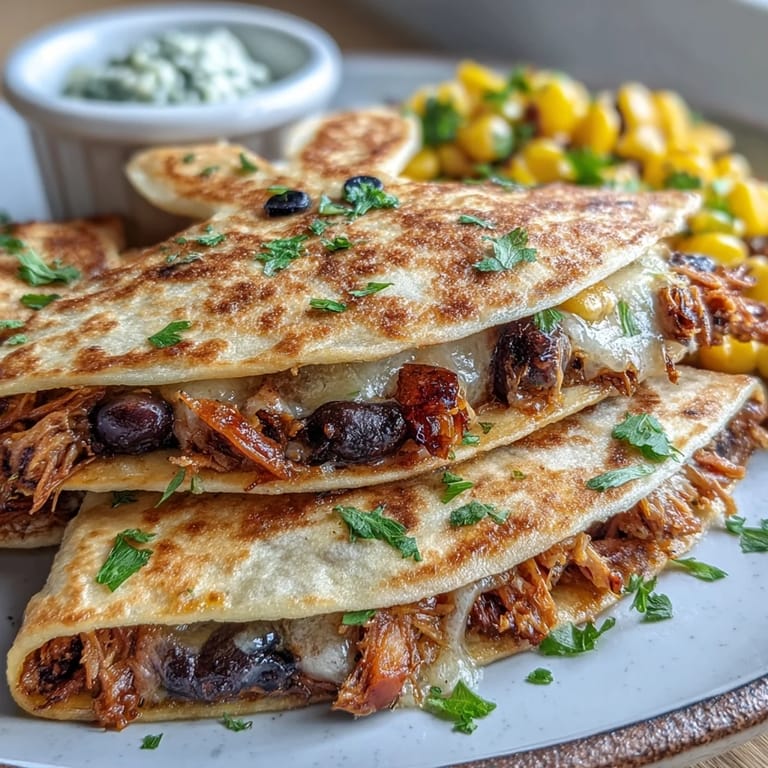
- Once the cheese has melted and the tortillas are golden, pull them from the oven and let them cool for just a minute so you don't burn your fingers. Press the olive slices gently into the cheese for eyes, add a carrot slice for the nose, and tuck parsley sprigs along the edge for whiskers—the warmth of the quesadilla helps everything stick.
- Serve with joy:
- Transfer to a plate and serve warm with sour cream for dipping, though honestly, people usually just want to admire them first.
 Save to Pinterest
 There's something quietly powerful about watching someone's face light up when their food looks like it was made with thought and care. These bunnies have a way of making people—especially the small ones—feel genuinely delighted about lunch, and that's worth every extra minute spent with a cookie cutter.
Make It Your Own
The filling I've given you is just a starting point, and honestly, that's the beauty of this recipe. Add shredded rotisserie chicken for protein, toss in some black beans for earthiness, or layer in some sautéed mushrooms if that's what your crew loves. I've also swapped the regular tortillas for spinach tortillas and suddenly the bunny has a green hue that looks autumn-ready, not just Easter-ready. The bunny shape is the constant; everything inside can shift based on what you have in the fridge.
Why Kids Actually Care About This
Most kids won't eat a regular quesadilla without negotiation, but tell them it's a bunny and suddenly there's no argument. It's not magic—it's just that when food has a face and a personality, it becomes an event instead of a chore. I've learned that the time you spend making something look special gets paid back tenfold in the absence of pushback at the table.
Timing and Storage Notes
These quesadillas taste best eaten fresh and warm, right when the cheese is still melty and the tortillas are still crispy. If you're making them ahead, assemble and bake them no more than a few hours before serving, then you can reheat gently in a 300°F oven for a few minutes. Leftovers can be stored in an airtight container in the fridge for up to two days, though the texture won't be quite as crispy—but they'll still taste good, and that's what matters.
- Cut your bunny shapes while tortillas are still cool and stiff so they hold their shape better during assembly.
- Don't overbake or the cheese can seize and become grainy instead of smooth and melted.
- If you're making these for a party, you can cut and assemble all the bunnies ahead of time, then bake them fresh right before serving.
 Save to Pinterest
 These little bunnies will forever be the quesadilla that made someone smile before they even took a bite. That's the whole recipe right there.
Recipe Questions & Answers
- → What cheeses can I use for these quesadillas?
Cheddar and mozzarella work well for melting and flavor, but you may substitute with Monterey Jack or Colby if preferred.
- → Can I make these bunny shapes without a cookie cutter?
Yes, carefully use a sharp knife and a printed template to cut bunny shapes from the tortillas.
- → How do I keep the quesadillas crispy after baking?
Brush the tops with melted butter before baking and serve them warm to maintain crispiness.
- → Are there vegetarian options for added protein?
Yes, add cooked shredded chicken or black beans inside the quesadillas to boost protein content.
- → What sides pair well with these bunny-shaped quesadillas?
Light fruit salads, vegetable sticks, or a dollop of sour cream complement these snacks nicely.