 Save to Pinterest
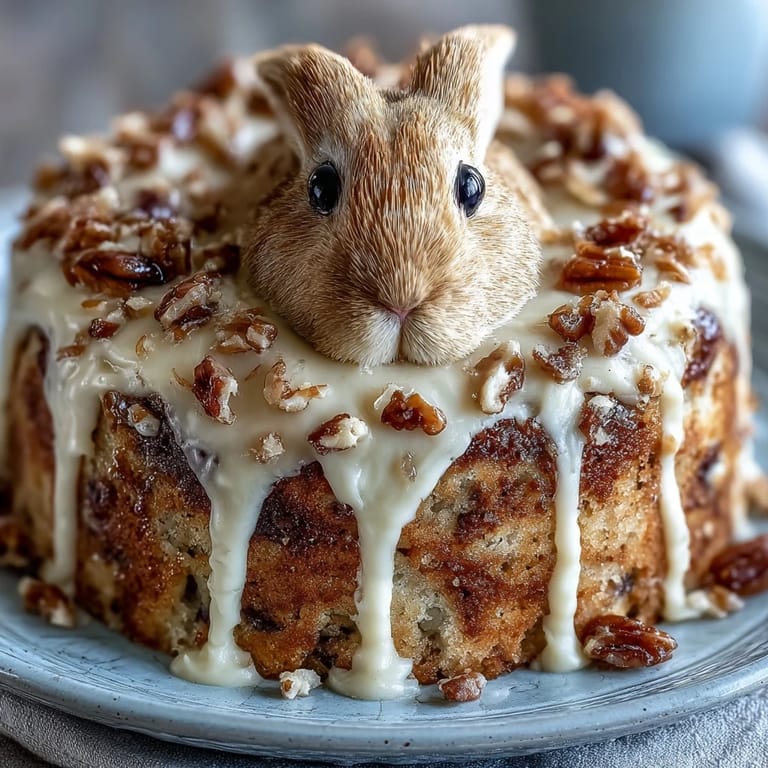
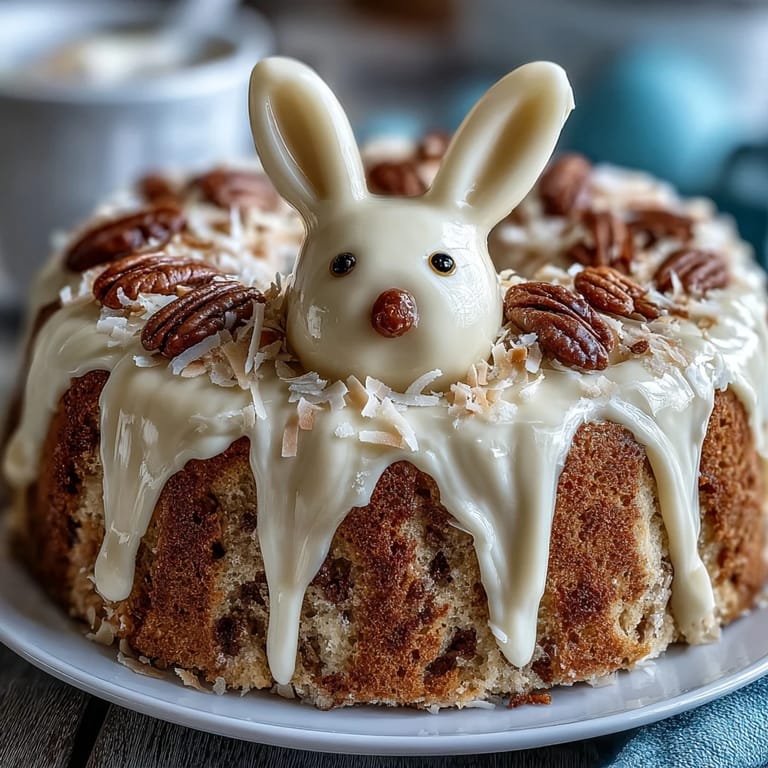
 My daughter's face when she bit into that first slice and the sprinkles cascaded out like confetti—that's when I knew this cake was something special. I'd been searching for a dessert that could surprise and delight at the same time, something that felt almost magical when cut open. The Easter Bunny Cake with its hidden sprinkle center struck that perfect balance between whimsical decoration and genuine wow factor. It's become our Easter tradition, the one thing everyone asks about before the holiday even arrives.
I made this for my niece's Easter party last spring, and watching her friends dig into their slices, eyes widening as the sprinkles tumbled out, reminded me why I love baking in the first place. It wasn't about perfection—one ear drooped slightly and the tail was a bit lopsided—but the joy it created made all of that completely irrelevant. That afternoon, the cake became more than dessert; it became a memory everyone kept referencing for months afterward.
Ingredients
- All-purpose flour (3 cups): The foundation of your cake's structure—measure by spooning into your measuring cup rather than scooping directly to avoid packing it down, which would make your cake dense.
- Baking powder (2½ tsp): This gives your cake that light, tender crumb that makes the surprise center feel even more delightful when bitten into.
- Salt (½ tsp): A small amount enhances the vanilla and balances the sweetness without tasting salty.
- Unsalted butter for cake (1 cup): Softened butter creams better and incorporates air into the batter, creating a more delicate texture.
- Granulated sugar (2 cups): The beating process with butter creates tiny air bubbles that keep the cake light and airy.
- Large eggs (4): Room temperature eggs blend more smoothly into the batter and help bind everything together with structure.
- Vanilla extract (1 tbsp): Use pure vanilla extract rather than imitation—the flavor difference is noticeable and makes your cake taste bakery-quality.
- Whole milk (1 cup): The liquid that brings everything together and keeps your cake moist without making it greasy.
- Assorted sprinkles (1 cup): This is where the magic happens—use a mix of colors and shapes to make the reveal even more festive and surprising.
- Unsalted butter for frosting (1 cup): Quality butter makes the frosting taste richer and more luxurious than the cake layer itself.
- Powdered sugar (4 cups): Sifting it first prevents lumpy frosting that feels grainy on the tongue.
- Milk for frosting (2–3 tbsp): Add slowly to reach the right consistency—too much and your frosting becomes runny, too little and it's hard to spread.
- Vanilla extract for frosting (1½ tsp): Reinforces that vanilla flavor throughout the whole cake experience.
- Pink food coloring (optional): Gel coloring gives more vivid results than liquid, especially if you want those ears and nose to really stand out.
- Shredded coconut (optional): Creates texture that mimics bunny fur and adds a subtle tropical note.
- Candy eyes: Your bunny needs a face—these are non-negotiable for personality.
- Pink jelly beans or candy for nose: Choose candies that won't melt into the frosting under room temperature.
- Marshmallows (optional): Soft and sweet, they make an adorable tail and floppy ears.
Tired of Takeout? 🥡
Get 10 meals you can make faster than delivery arrives. Seriously.
One email. No spam. Unsubscribe anytime.
Instructions
- Get your pans ready and heat your oven:
- Preheat to 350°F (175°C) and generously grease and flour both 8-inch round cake pans, making sure to coat the bottoms and sides so nothing sticks. This prep work takes literally two minutes but saves you from cake disasters later.
- Mix your dry ingredients:
- Whisk together flour, baking powder, and salt in a medium bowl—this combines them evenly so your batter rises uniformly rather than having dense pockets. The whisking motion also aerates the flour slightly, which helps with texture.
- Cream butter and sugar into fluffy clouds:
- Beat softened butter and sugar together for 3–4 minutes until the mixture looks pale and fluffy, almost like frosting itself. This is where air gets incorporated, and you'll actually hear the mixer doing the work—it sounds different when it's properly creamed.
- Add eggs one at a time with care:
- After each egg goes in, beat until it's fully incorporated before adding the next one, which takes about a minute per egg. Rushing this step results in broken eggs that don't bind properly into the batter.
- Stir in vanilla and create the batter:
- Mix vanilla extract in, then alternate adding the flour mixture and milk in three parts—flour, milk, flour, milk, flour—starting and ending with flour. Mixing just until combined prevents overworking the batter, which would make your cake tough instead of tender.
- Divide and bake:
- Split the batter evenly between pans and bake for 35–40 minutes until a toothpick inserted in the center comes out clean with maybe a crumb or two clinging to it. The tops should spring back when you gently press them with your finger.
- Cool with patience:
- Let cakes rest in their pans for 10 minutes—this prevents them from crumbling—then turn them out onto wire racks to cool completely, which usually takes about an hour. Frosting a warm cake causes the frosting to melt and slide off, so don't skip this step.
- Create the hidden center surprise:
- Once cool, use a 3-inch round cutter to carefully cut a hole in the center of one cake layer, wiggling gently to avoid crumbling. That little circle you just cut out becomes your lid later, so set it aside carefully.
- Build your secret layers:
- Place the intact cake layer on your serving plate, spread a thin layer of frosting on top, then position the layer with the hole directly on top of it. The frosting acts as glue holding everything together.
- Fill the hidden center:
- Pour your assorted sprinkles into the hole until it's full—this is where the magic happens, and everyone will remember this moment. Replace the cake circle you cut out earlier to seal everything in and hide the surprise.
- Make your frosting:
- Beat softened butter until creamy, then gradually add powdered sugar so you avoid lumps, scraping down the bowl occasionally. Add vanilla and milk a little at a time until the frosting reaches the right consistency—spreadable but not runny.
- Frost and shape your bunny:
- Frost the entire cake first with a thin crumb coat, chill for 15 minutes, then apply a thicker final coat for a polished look. Cut the remaining cake layer strategically to create bunny ears and a bowtie, arranging everything on a large board like you're building an edible sculpture.
- Decorate with personality:
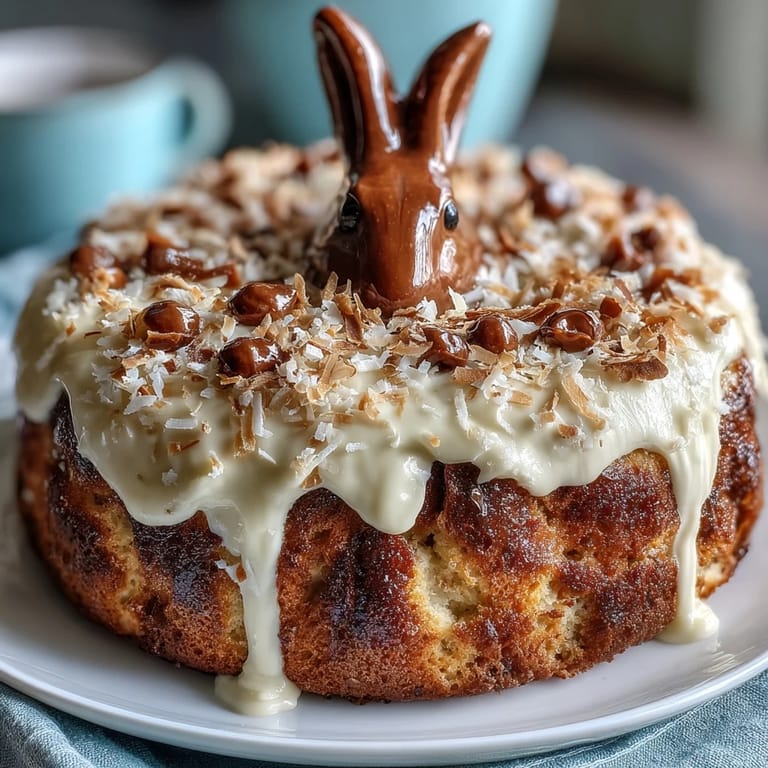
- Add coconut for fluffy fur, candy eyes for an expression, pink frosting or jelly beans for the nose, and marshmallows for a soft tail. Step back and look at your creation—it should make you smile because it's genuinely charming, imperfect or not.
- Chill before serving:
- Refrigerate for 30 minutes so the frosting sets and the surprise center stays cold and fresh. This also makes slicing cleaner since everything holds together better when chilled.
 Save to Pinterest
 There's something about serving this cake that transforms an ordinary Easter dinner into something memorable and special. The cake becomes the conversation, the centerpiece, the reason people linger at the table a little longer, and honestly, that's what baking is really about.
Troubleshooting Your Bunny Cake
I've made this cake enough times to know where things can go slightly sideways, and every mishap has taught me something valuable. If your frosting seems grainy, it means your powdered sugar wasn't sifted beforehand—sift it first next time and the frosting will feel silky smooth. If the cake seems a bit dense, your flour was probably packed too tightly when measuring, so use the spoon-and-level method instead of scooping straight into the bag. If your bunny ears keep drooping, chill them for a few minutes before final assembly so the frosting sets slightly and provides structure.
Variations to Keep Things Interesting
Once you've mastered the classic version, there's so much room to play around and make it yours. A chocolate version simply swaps ½ cup of flour for ½ cup cocoa powder, which sounds simple but creates an entirely different flavor experience that's equally delightful. You can also use store-bought cake mix if you're short on time or energy—no one needs to know, and the surprise center is what people will remember anyway.
Make It Your Own
The beauty of this cake is that it's more of a framework than a strict formula, and I've seen people make it their own in the most creative ways. Some friends have made it with pastel-colored frosting instead of pink, others have added edible glitter to the sprinkles for extra sparkle, and one person even filled the center with chocolate chips instead of sprinkles. What matters most is that you make it with intention and serve it to people who appreciate the joy you're creating.
- Gel food coloring gives you more vibrant bunny ears and noses than liquid coloring, especially if you're going for Easter pastels.
- Chill your frosting for 15 minutes between coats so each layer sets slightly and prevents sliding—this small step makes decorating infinitely easier.
- Assemble the whole cake on a serving board or cake stand rather than a plate, which makes it easier to transport and more impressive to display.
 Save to Pinterest
 This Easter Bunny Cake has become my favorite thing to make because it combines all the parts of baking I love most—technique, creativity, and the pure happiness it brings to people's faces. Make it, decorate it your way, and create your own traditions around it.
Recipe Questions & Answers
- → How do I create the hidden sprinkle center?
After baking and cooling the cake layers, use a round cutter to carve out a small center hole in one layer. Fill it with assorted sprinkles, then seal with the cut-out piece before frosting.
- → Can I make the cake chocolate-flavored?
Yes, replace half a cup of flour with cocoa powder to introduce a rich chocolate taste without affecting texture.
- → What decorations work best for the bunny shape?
Use shredded coconut for fur texture, candy eyes for expression, and pink jelly beans or frosting for the nose and ears. Marshmallows add charm for the tail and ears.
- → How long should the cake chill before serving?
Chill the assembled cake for at least 30 minutes to allow the buttercream frosting to firm up and ensure the sprinkle center stays intact.
- → Are there any allergens to be aware of?
This cake contains wheat, eggs, and dairy. Sprinkles or candies may contain soy or traces of nuts; always check packaging.