 Save to Pinterest
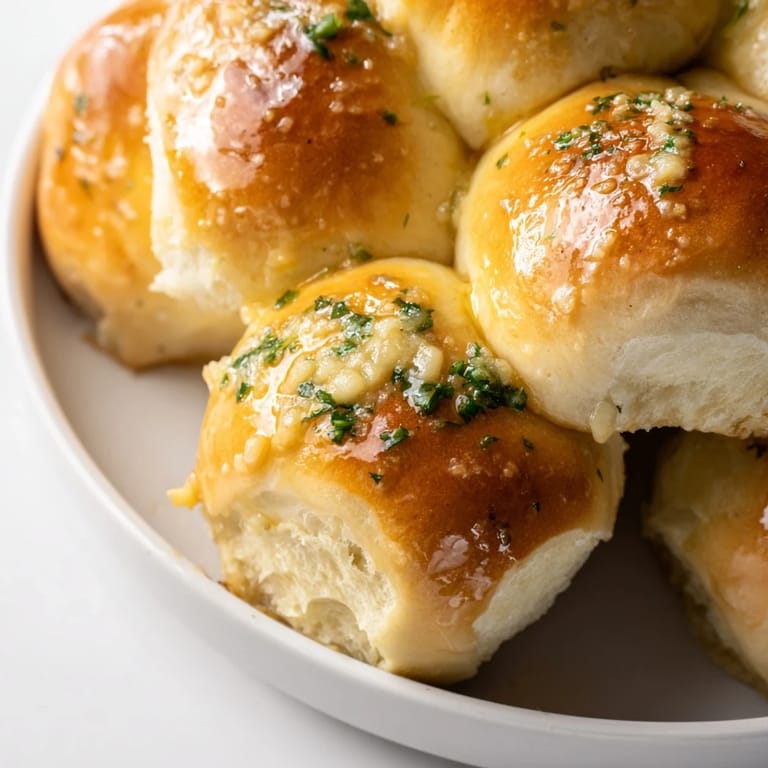
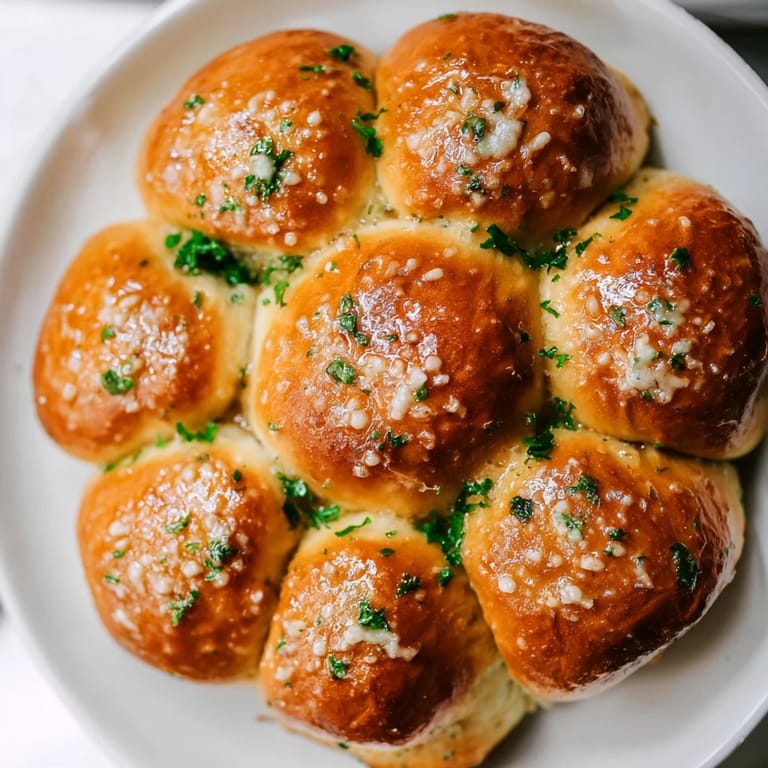
 The delicious scent of garlic butter bread brings me right back to my sister's birthday gathering last winter. We were all huddled around her kitchen island, chatting and laughing while I assembled what would become everyone's favorite part of the meal. There's something magical about the way the kitchen fills with that rich, garlicky aroma as these rolls bake. The anticipation builds as the buttery fragrance grows stronger, transforming ordinary bread into something irresistible.
I first made these rolls during a spontaneous dinner with neighbors after a power outage had us all emptying our freezers. Working by candlelight, I kneaded the dough while we swapped stories, and the primitive simplicity of making bread by hand became oddly comforting. When we finally tore into the warm, fragrant rolls, passing them around the table, it transformed our little emergency gathering into something memorable.
Ingredients
- All-purpose flour: The backbone of our bread providing that perfect chew I discovered works best when measured by weight rather than volume if you have a kitchen scale.
- Instant yeast: My go-to for reliability since it doesnt need proofing separately and seems to give a more consistent rise especially when Im in a hurry.
- Warm milk: This creates a tenderness in the rolls that water just cant match I learned this from my grandmother who never used water in her bread recipes.
- Fresh garlic: After experimenting with both jarred and fresh, the aromatic punch of freshly minced garlic makes an unmistakable difference in the final flavor intensity.
- Butter: I use unsalted so I can control the exact salt level splurging on European-style butter with higher fat content creates an even richer result worth trying at least once.
Tired of Takeout? 🥡
Get 10 meals you can make faster than delivery arrives. Seriously.
One email. No spam. Unsubscribe anytime.
Instructions
- Mix the foundation:
- Combine flour, yeast, sugar and salt in a large bowl before pouring in that warm milk and melted butter. The dough will look shaggy at first, but trust the process.
- Knead with patience:
- Work the dough until it transforms under your hands, becoming smooth and stretchy. Youll feel the texture change as the gluten develops those magical elastic strands that give bread its structure.
- First rise magic:
- Tuck your dough into a greased bowl like its going for a warm nap. The transformation as it doubles in size always feels like a small miracle in my kitchen.
- Prepare the flavor bomb:
- Mix the melted butter with minced garlic, parsley, salt and pepper until its a fragrant pool of goodness. This mixture will infuse every bite with garlicky perfection.
- Shape and coat:
- Divide your risen dough into 12 pieces, roll each into a ball, then give them a luxurious bath in the garlic butter. Arrange them snugly in your pan so theyll grow together as they bake.
- Second rise and bake:
- Let the butter-coated dough balls rise again until puffy, then slide them into a preheated oven. The aroma that fills your kitchen will make the waiting almost unbearable.
- Serve with ceremony:
- After a brief cooling period, place the golden creation in the center of your table. The communal act of pulling apart these aromatic treasures creates an instant connection around any meal.
 Save to Pinterest
 My neighbor Ellie, who usually claims to have iron willpower around carbs, once reached for her fourth piece of this bread during a casual weeknight dinner. She caught my eye mid-bite, laughing through a mouthful, and declared that some things were worth breaking rules for. That moment crystallized for me how food creates these little permission slips to indulge not just in flavors but in connection, spontaneity, and joy.
Make-Ahead Options
The revelation that changed my entertaining game was discovering I could prepare these rolls through the first rise, shape them, then refrigerate overnight. The slow, cold rise actually develops more flavor complexity, and the next day I just need to let them come to room temperature, do the final rise, and bake. My kitchen stays clean when guests arrive, yet they still get that intoxicating freshly-baked aroma.
Flavor Variations
After making this bread dozens of times, Ive discovered the basic garlic butter formula welcomes creative additions that transform the experience. A handful of finely grated Gruyère folded into the garlic butter creates pockets of molten cheese that stretch satisfyingly with each pull. Fresh herbs change with the seasons in my version rosemary in winter, basil in summer, and thyme practically year-round offer subtle flavor shifts that keep the recipe exciting.
Serving Suggestions
The versatility of this pull-apart bread continues to surprise me even after countless preparations. One particularly memorable evening, we tore pieces to dip into a bubbling pot of cheese fondue, creating this wonderfully interactive meal that had everyone lingering at the table for hours.
- For a casual gathering, serve alongside a hearty tomato soup or stew where the bread becomes both utensil and accompaniment.
- Create an elevated appetizer spread by placing the bread alongside good olive oil, balsamic glaze, and a soft cheese like ricotta drizzled with honey.
- Remember that while delicious at room temperature, a quick 5-minute reheat in a 300°F oven revives the just-baked texture and aroma.
 Save to Pinterest
 Every time I set this golden, aromatic creation on the table, I watch as conversation pauses momentarily while hands reach toward the center. In that brief moment of shared anticipation, before the first piece is pulled away, theres a perfect unity that reminds me why breaking bread together has been meaningful throughout human history.
Recipe Questions & Answers
- → Can I make the dough ahead of time?
Yes, you can prepare the dough in advance and refrigerate it after the first rise for up to 24 hours. Allow it to come to room temperature before shaping and proceeding with the garlic butter coating.
- → What can I substitute for fresh parsley?
You can use dried parsley (1 tablespoon instead of 2 tablespoons fresh), or substitute with fresh chives, basil, or oregano for different flavor profiles.
- → How do I store leftover rolls?
Store leftover rolls in an airtight container at room temperature for up to 2 days, or refrigerate for up to 5 days. Reheat in the oven at 300°F for 8-10 minutes to restore softness and warmth.
- → Can I freeze these rolls?
Absolutely. Freeze the baked and cooled rolls in a freezer-safe container for up to 3 months. Thaw at room temperature and reheat in the oven before serving.
- → What type of pan works best for this dish?
A 9-inch round cake pan or oven-safe skillet works perfectly. You can also use a square baking dish, though the arrangement may differ slightly. Ensure the pan is well-greased to prevent sticking.
- → How can I make these rolls even more flavorful?
Add chili flakes for heat, tuck mozzarella cubes inside each dough ball for a cheesy surprise, or brush with extra garlic butter immediately after baking for an even richer taste.