 Save to Pinterest
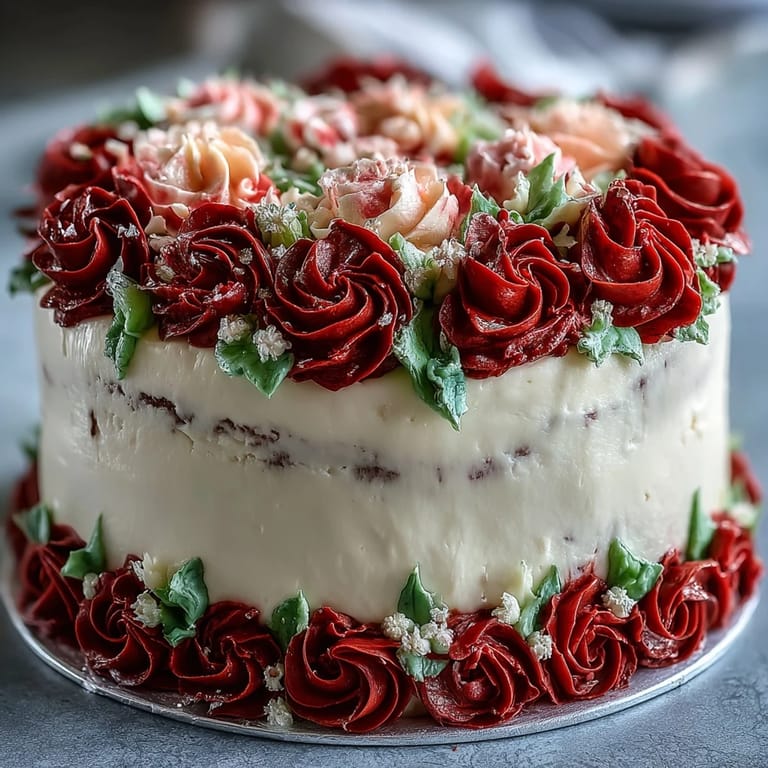
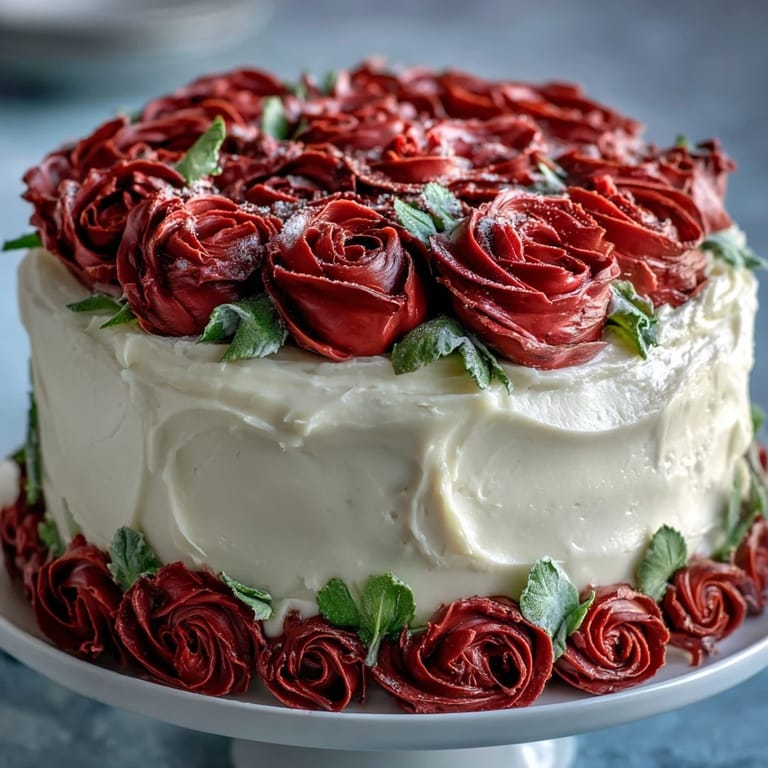
 The day my niece walked across that stage, I knew the sheet cake had to be spectacular. I'd watched her stress through late-night study sessions, and suddenly there she was—a graduate. Standing in my kitchen the night before her party, I decided this cake would be more than just dessert; it would be the centerpiece of her celebration, crowned with buttercream roses I'd spent weeks practicing. That soft vanilla cake, pillowy and moist, felt like the right way to say I'm proud of you without words.
I'll never forget the moment my cousin's eight-year-old pointed at the roses and gasped, thinking they were real flowers. That's when I understood—this cake wasn't just food, it was magic. The buttercream was silky enough to pipe smoothly but sturdy enough to hold those delicate petal shapes, and watching people's faces light up when they realized they could eat the decorations made every minute of piping worthwhile.
Ingredients
- All-purpose flour (3 cups): This is your cake's structure, so measure by spooning into your cup and leveling—scooping straight from the bag can pack it too tightly and make your cake dense.
- Baking powder and baking soda (2½ tsp and ½ tsp): These two work together to create that tender crumb, so don't skip sifting them with the flour or you'll end up with bitter pockets.
- Unsalted butter, room temperature (1 cup for cake, 1½ cups for frosting): Cold butter won't cream properly, so pull it out an hour before you start—this is non-negotiable for a fluffy cake.
- Granulated and powdered sugar: The granulated sugar creams into the butter to trap air and lift your cake; the powdered sugar in the frosting dissolves into silky smoothness that pipes like a dream.
- Eggs, room temperature (4 large): Cold eggs won't emulsify properly into the butter mixture, which means a greasy cake instead of a tender one.
- Vanilla extract (1 tbsp for cake, 2 tsp for frosting): This is what makes people taste this cake and ask what your secret ingredient is.
- Whole milk, room temperature (1¼ cups for cake, ¼ cup for frosting): The alternating method of adding flour and milk keeps your batter light and the cake tender.
- Gel food coloring (assorted colors): Gel coloring won't thin your buttercream like liquid dyes do, and the colors are more vibrant—absolutely worth seeking out.
Tired of Takeout? 🥡
Get 10 meals you can make faster than delivery arrives. Seriously.
One email. No spam. Unsubscribe anytime.
Instructions
- Set up your baking station:
- Preheat your oven to 350°F and line a 12x18-inch sheet pan with parchment paper—this prevents sticking and lets you lift the cooled cake out cleanly. Have all your ingredients at room temperature sitting on the counter; this one step makes the difference between a dense cake and one that rises beautifully.
- Sift your dry ingredients:
- Whisk together flour, baking powder, baking soda, and salt in a medium bowl—the whisking aerates the flour and distributes the leavening agents evenly. This prevents those bitter pockets of baking soda that can ruin a slice.
- Cream butter and sugar until it's fluffy:
- Beat them together for 3-4 minutes until the mixture is pale and voluminous, almost like a mousse—you're literally trapping air bubbles that will make your cake rise. This is where the magic starts, so don't rush it.
- Add eggs one at a time with intention:
- After each egg, beat for about 30 seconds before adding the next one—this ensures even incorporation and prevents the batter from looking curdled or separated. Add your vanilla and listen for that smooth, creamy sound when the beaters hit the bowl.
- Alternate flour and milk gently:
- Start and end with flour, adding about a third of each in turns—this keeps your batter smooth and prevents it from becoming too thin. Mix just until combined after each addition; overmixing develops gluten and toughens the cake.
- Bake until golden and set:
- Pour the batter into your prepared pan and smooth the top with an offset spatula, then bake for 30-35 minutes until a toothpick inserted in the center comes out clean. You'll smell that vanilla-sweet aroma filling your kitchen, and that's your cue to check it.
- Cool completely before frosting:
- Let the cake cool in the pan on a wire rack for about 15 minutes, then turn it out and let it cool completely—frosting a warm cake will melt and slide right off. This is the hardest part because you're so close to seeing the finished cake.
- Make your buttercream base:
- Beat room-temperature butter until it's creamy and pale, then gradually add sifted powdered sugar a cup at a time, alternating with the milk and vanilla. Beat for about 5 minutes until it's fluffy and light enough to hold stiff peaks when you lift the beaters.
- Tint your buttercream in sections:
- Divide the frosting into bowls and add gel coloring in small amounts—a toothpick dab of gel goes a long way, and you can always add more but you can't remove it. Start light and build to the shade you want, and leave plenty of white for your base layer.
- Spread a smooth base layer:
- Spread a thin, even layer of white buttercream across the entire cooled cake using an offset spatula—this gives you a smooth canvas for piping and helps your roses stand out. A turntable makes this easier if you have one, but working slowly and steadily on a flat surface works just fine.
- Pipe your roses with confidence:
- Fit piping bags with petal tips for roses and leaf tips for greenery, then pipe in overlapping motions to create dimension—roses look impressive but they're just petal shapes layered on top of each other. Start in the corners or create a border, then fill in gaps, and step back often to see how it's looking.
- Add your personalized message:
- Use a small round tip and contrasting frosting color to write a congratulations message or the graduate's name—practice on parchment paper first if you're nervous. This personal touch turns a beautiful cake into a celebration.
 Save to Pinterest
 My favorite part wasn't the piping or even how beautiful it turned out—it was watching my niece taste that first bite and close her eyes, genuinely surprised by how moist and delicate the cake was. She told me later that cake meant someone spent time thinking about making her day special, and that's exactly what this recipe is for.
Why This Cake Works for Celebrations
A sheet cake is the practical hero of celebrations—it feeds a crowd without requiring three-tier stacking skills, and the large flat surface is basically a blank canvas for decorating. I've used this cake for graduations, anniversaries, and even a surprise party, and every time it's the first thing people ask about. The vanilla flavor is classic enough that no one tires of it, but the moist crumb keeps people coming back for seconds.
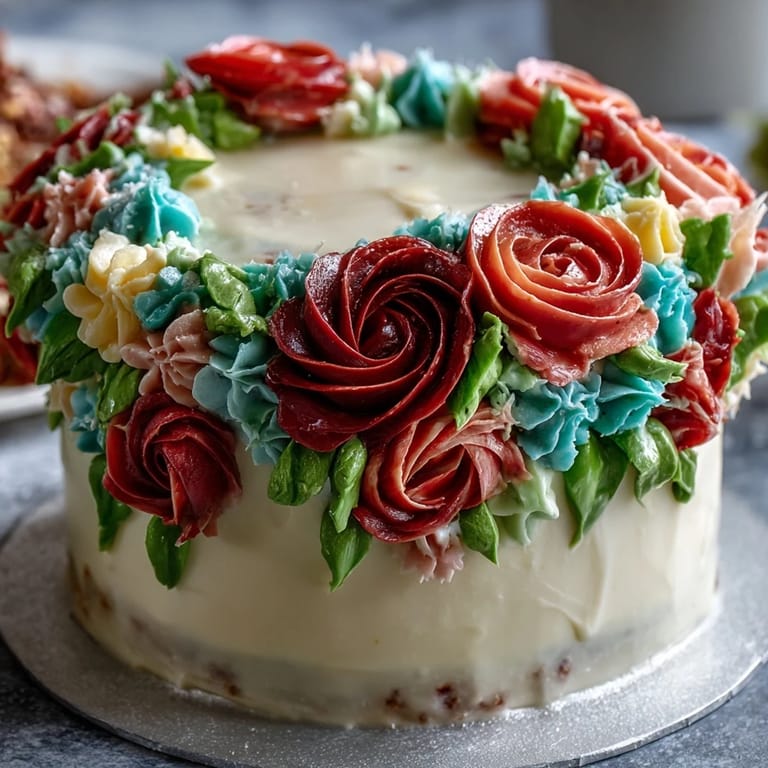
Mastering the Piped Roses
The roses look fancy but they're honestly just repetitive practice in a piping bag—each rose is made from overlapping petal strokes, and even wobbly ones look charming when they're clustered together. I spent an evening piping practice roses on a sheet of parchment, and by the tenth one, my hand remembered the motion. The key is not being precious about perfection; even slightly lopsided roses look intentional and beautiful when you add leaves and fill in gaps with smaller touches.
Storage and Make-Ahead Magic
This cake actually tastes better the next day because the crumb has time to absorb the moisture and the flavors meld together—I learned this when I made one too early and it was somehow even more delicious the day of the party. You can bake and cool the cake layers a day ahead, cover them loosely, and frost them the morning of your event, which spreads the work and reduces party-day stress. Store leftovers covered at room temperature for up to two days, or refrigerate for up to five days if you want them to last longer, though they rarely do.
- Make the cake a day ahead and frost it the morning of your party to keep stress at bay.
- Those leftover roses are perfect for snacking straight from the fridge—a small guilty pleasure no one needs to know about.
- If you need to transport the cake, let the frosting set in a cool room first, then cover it loosely with plastic wrap to protect the decorations.
 Save to Pinterest
 This cake has become my go-to celebration dessert because it delivers on looks and taste, and it reminds me that the best moments are when people gather around something made with care. Bake it for someone who deserves celebrating.
Recipe Questions & Answers
- → How do I achieve moist cake texture?
Use room temperature ingredients and alternate adding dry flour mixture with milk gently to avoid overmixing, resulting in a soft, tender crumb.
- → What’s the best way to pipe buttercream roses?
Use a petal piping tip with steady pressure, rotating the flower base as you pipe overlapping petals for natural rose shapes.
- → Can I prepare the cake decorations in advance?
Yes, you can tint and pipe buttercream flowers a day ahead and store them covered in the refrigerator to maintain shape and freshness.
- → How should the cake be stored after decorating?
Keep the decorated cake covered at room temperature for up to two days or refrigerate for up to five days to preserve texture and flavor.
- → Are there variations to the vanilla flavor?
Yes, substituting part of the flour with cocoa powder creates a chocolate version while maintaining the buttercream decoration method.