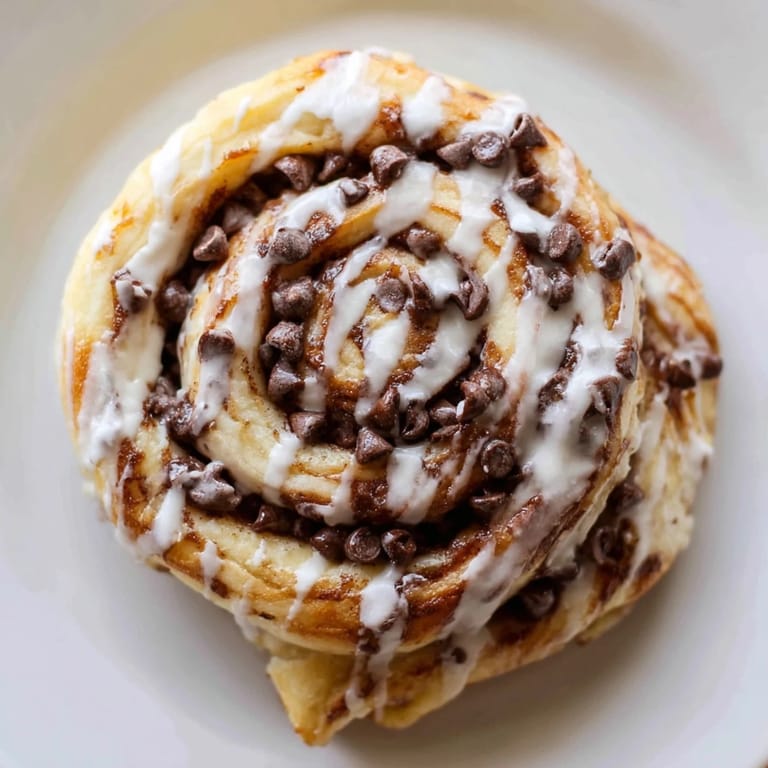
 Save to Pinterest
 The first time I made these Nutella Chocolate Chip Rolls, my kitchen filled with an aroma that can only be described as pure magic. I was attempting to create something special for a Sunday morning brunch with friends when I decided to combine my love for cinnamon rolls with my borderline unhealthy obsession with Nutella. The dough rose perfectly that morning, and as I slathered that glossy hazelnut spread across it, I knew I'd stumbled onto something dangerous – in the best possible way.
My nephew Jacob once declared these rolls better than birthday cake, which in the hierarchy of an eight-year-old's food preferences is the highest possible honor. We now make them every year on the first day of summer vacation – a tradition that started three years ago when it rained for a week straight and we needed something to brighten our indoor days. The kitchen counter covered in flour, his little hands eagerly helping roll the dough, has become one of those snapshots of childhood I hope neither of us forgets.
Ingredients
- Active Dry Yeast: The foundation of our pillow-soft dough, I learned to be patient with the initial bloom – those 5 minutes of waiting tell you everything about how your rolls will turn out.
- Nutella: I keep mine at room temperature for at least 30 minutes before spreading to ensure it glides across the dough without tearing it.
- Mini Chocolate Chips: The regular-sized ones work too, but minis distribute better and create pockets of melty goodness in every bite rather than concentrated bursts.
- Whole Milk: I tried making these with 2% once in a pinch, and while they turned out fine, the richness from whole milk creates that bakery-quality tenderness we're after.
- Unsalted Butter: Having control over the salt content makes all the difference, especially since Nutella brings its own sweetness to the party.
Tired of Takeout? 🥡
Get 10 meals you can make faster than delivery arrives. Seriously.
One email. No spam. Unsubscribe anytime.
Instructions
- Wake Up The Yeast:
- Combine warm milk, yeast, and a tablespoon of sugar, then wait until it foams up like a science experiment gone right. This bubbly mixture is your first sign of success – if it doesn't foam, your yeast might be past its prime.
- Build Your Dough Base:
- Mix in the butter, remaining sugar, eggs, and salt until they become fast friends. The mixture should look slightly curdled at this stage, which is completely normal.
- Transform Into Smooth Dough:
- Gradually add flour while mixing until the shaggy mess transforms into a soft, cohesive dough. When kneading, you're looking for that smooth, slightly tacky texture that bounces back when poked.
- First Rise Magic:
- Place your dough baby in an oiled bowl, covered with a kitchen towel, somewhere warm and draft-free. I sometimes turn the oven on for just 1 minute, then off, creating the perfect rising environment.
- Roll Out The Canvas:
- On a floured surface, roll the dough into a 14×18-inch rectangle – it should be about as thick as a quarter. Aim for relatively even thickness throughout.
- Create The Flavor Swirl:
- Spread butter first, then that glorious layer of Nutella, followed by a snowfall of mini chocolate chips. This order matters for proper melting and distribution during baking.
- Roll And Slice:
- Roll the dough tightly from the long edge, pinching the seam to seal. For clean cuts, dental floss works miraculously – slide it under the log, cross over the top, and pull for perfect slices.
- Second Rise And Bake:
- Once arranged in the pan, give them space to rise again until they're touching shoulders. They'll transform in the oven from pale neighbors to golden-brown family.
- Glaze While Warm:
- The simple milk-and-powdered-sugar glaze should be drizzled while the rolls are still warm enough to slightly melt it. This creates that bakery-style finish that makes everyone grab for their phones before grabbing a roll.
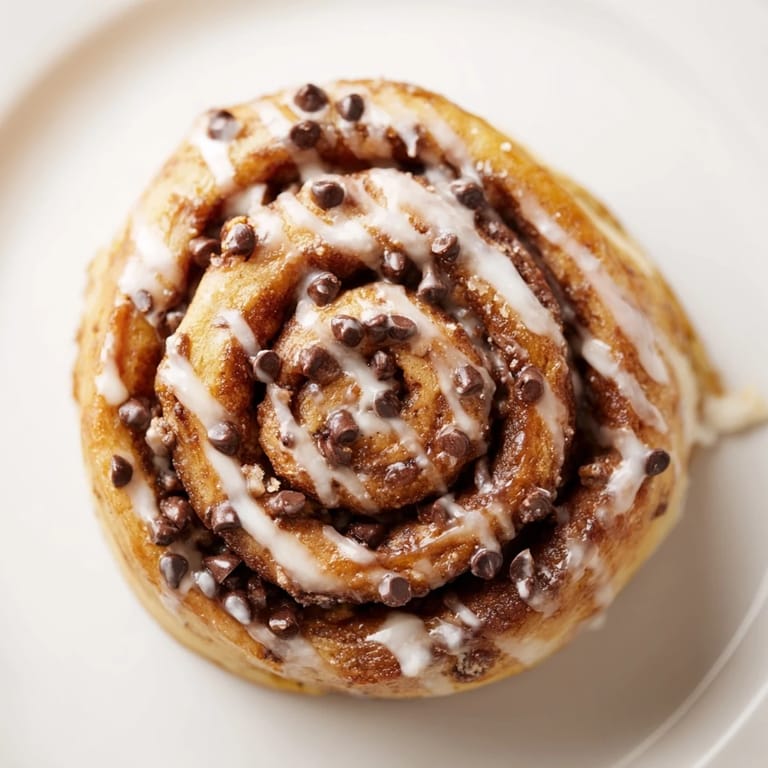 Save to Pinterest
 Last Christmas morning, as snowflakes drifted past the kitchen window, I pulled a batch of these rolls from the oven just as family started to trickle downstairs in their pajamas. My usually stoic father-in-law took one bite, closed his eyes, and simply said, This is what holidays should taste like. In that moment, amid the torn wrapping paper and holiday chaos, these humble rolls somehow became the centerpiece of our celebration – proof that sometimes the most meaningful gifts come from flour-dusted hands.
Make-Ahead Magic
After years of morning baking panic, I discovered these rolls can be refrigerated overnight after shaping and before the second rise. I now prepare everything the evening before, arrange the sliced rolls in the baking pan, cover tightly with plastic wrap, and refrigerate. The next morning, I simply let them come to room temperature for about 45 minutes (they'll rise slightly in the fridge overnight), then bake as directed. The slow, cold fermentation actually develops more complex flavors in the dough – a happy accident that became my standard method.
Troubleshooting Sticky Situations
The trickiest moment in this recipe is undoubtedly spreading the Nutella without tearing the dough. One summer morning, frustrated by the Nutella clinging to my spatula instead of the dough, I warmed the spatula under hot water, dried it quickly, and tried again. The heated tool glided through the spread like butter, allowing for an even layer without any dough casualties. If your kitchen is particularly cold, you can also place the jar of Nutella in a bowl of warm water for a few minutes to make it more spreadable.
Serving And Storage
These rolls reach their peak glory within the first hour after baking, when the chocolate is still slightly molten and the dough maintains that perfect balance between structure and tenderness. If you have leftovers (a rare occurrence in my house), storing them properly can preserve much of their charm for 2-3 days.
- To reheat individual rolls, microwave for 15-20 seconds or until just warm – any longer risks turning the dough tough.
- For a crowd-pleasing presentation, arrange rolls on a platter with a small bowl of extra Nutella for dipping or spreading.
- Freeze fully cooled rolls without glaze for up to a month, then thaw overnight and warm in a 300°F oven for 10 minutes before glazing.
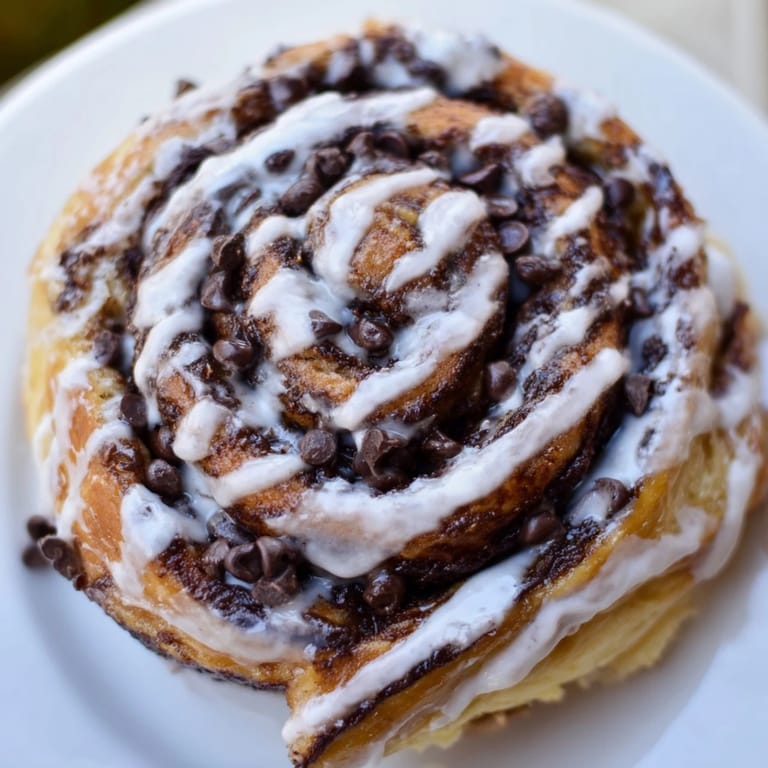 Save to Pinterest
 These Nutella Chocolate Chip Rolls have a way of creating moments that linger long after the last crumb is gone. Whether shared across a Sunday table with friends or savored quietly with your morning coffee, they carry that rare ability to transform an ordinary day into something worth remembering.
Recipe Questions & Answers
- → Can I make the dough ahead of time?
Yes, you can prepare the dough the night before. After the first rise, punch it down, cover tightly, and refrigerate overnight. Let it come to room temperature for 30 minutes before rolling out.
- → What can I substitute for Nutella?
You can use any chocolate hazelnut spread, cookie butter, or even a mixture of melted chocolate and peanut butter for a different flavor profile.
- → How do I prevent the filling from leaking out?
Make sure to roll the dough tightly and seal the seam well. Don't overfill, and leave a small border around the edges when spreading the Nutella.
- → Can I freeze these rolls?
Absolutely. Freeze baked rolls without glaze for up to 3 months. Thaw at room temperature and warm in the oven at 300°F for 10 minutes before glazing.
- → Why did my rolls turn out dry?
Overbaking is the most common cause. Check at 22 minutes and remove when just golden. Also ensure your dough was properly hydrated and not over-kneaded.
- → Can I use instant yeast instead of active dry yeast?
Yes, instant yeast works perfectly. Use the same amount and mix it directly with the dry ingredients without proofing first.