 Save to Pinterest
 There's something almost magical about baking cookies that remind you of a video game character—especially one as elegant and serene as Pure Vanilla Cookie. My nephew was obsessed with Cookie Run Kingdom, and one afternoon he casually mentioned wishing he could eat cookies that looked like his favorite character. That throwaway comment stuck with me, and I found myself researching royal icing techniques and vanilla cookie recipes like I was on a quest myself. These cookies became my love letter to his gaming world, but honestly, they're just as delicious for anyone who appreciates a classic vanilla sugar cookie with that glossy, professional-looking finish.
I'll never forget the look on my nephew's face when I brought a decorated box of these cookies to his birthday party. His friends immediately started asking if they were store-bought, and watching him explain that his aunt made them—with Pure Vanilla Cookie colors and everything—was worth every minute of piping work. That's when I realized these weren't just cookies; they were edible proof that someone paid attention to what he loved.
Ingredients
- All-purpose flour: The foundation of tender cookies, so make sure it's fresh and lightly spoon-measured rather than scooped straight from the bag to avoid a tough dough.
- Unsalted butter: Softened is non-negotiable here because cold butter won't cream properly with the sugar, and you'll miss out on that light, fluffy texture.
- Granulated sugar: This is what gives the cookies structure and that slightly crispy edge while the centers stay tender.
- Pure vanilla extract: Don't skip this or substitute imitation—the difference is immediately noticeable in the flavor, especially since vanilla is the star of the show.
- Powdered sugar and meringue powder: These two together create royal icing that dries hard and smooth, perfect for detailed decoration without cracking.
- Gel food coloring: Gel colors are more concentrated than liquid, so they won't thin your icing or create muddy, washed-out tones.
Tired of Takeout? 🥡
Get 10 meals you can make faster than delivery arrives. Seriously.
One email. No spam. Unsubscribe anytime.
Instructions
- Mix your dry ingredients first:
- Whisk the flour, baking powder, and salt together in a bowl and set it aside. This ensures everything is evenly distributed and prevents overmixing later when you combine wet and dry.
- Cream butter and sugar until fluffy:
- Beat them together for a full 2-3 minutes until the mixture looks pale and airy—this incorporates air bubbles that make cookies tender rather than dense. You should be able to see a visible lightening in color.
- Add wet ingredients gently:
- Mix in the egg, vanilla, and milk until just combined. Don't overbeat once the egg goes in, or you'll develop too much gluten and toughen the dough.
- Fold in the dry mixture:
- Add the flour mixture in two batches, mixing on low speed just until you don't see dry streaks. The dough comes together quickly, so stop as soon as it does.
- Chill strategically:
- After flattening the dough into disks and wrapping them, refrigerate for at least an hour. Cold dough is easier to roll and cut without sticking, and it also prevents excessive spreading in the oven.
- Roll and cut with confidence:
- Work with one dough disk at a time, keeping the other chilled. Roll to exactly 1/4-inch thickness between two pieces of parchment paper to avoid adding extra flour, which makes cookies tough.
- Space cookies thoughtfully:
- Leave a full inch between each cookie on the baking sheet so they bake evenly and develop that subtle golden edge without touching each other.
- Bake until just barely golden:
- Pull them out when the edges are just beginning to turn light golden brown—they'll continue cooking slightly on the hot pan. Overbaked cookies become crispy rather than tender.
- Master royal icing consistency:
- Start with 4 tablespoons of water and add more drop by drop until you reach the right consistency. For piping details, you want it slightly thicker; for flooding, thinner.
- Decorate with patience:
- Let cookies cool completely before icing so the royal icing sets properly and doesn't slide off warm cookies. The icing will dry hard and matte within a few hours.
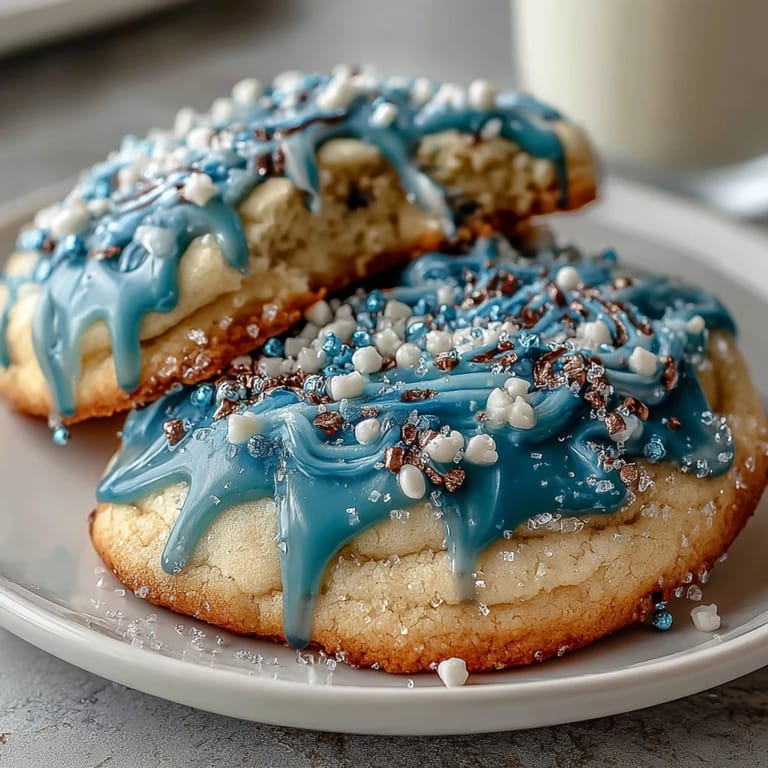
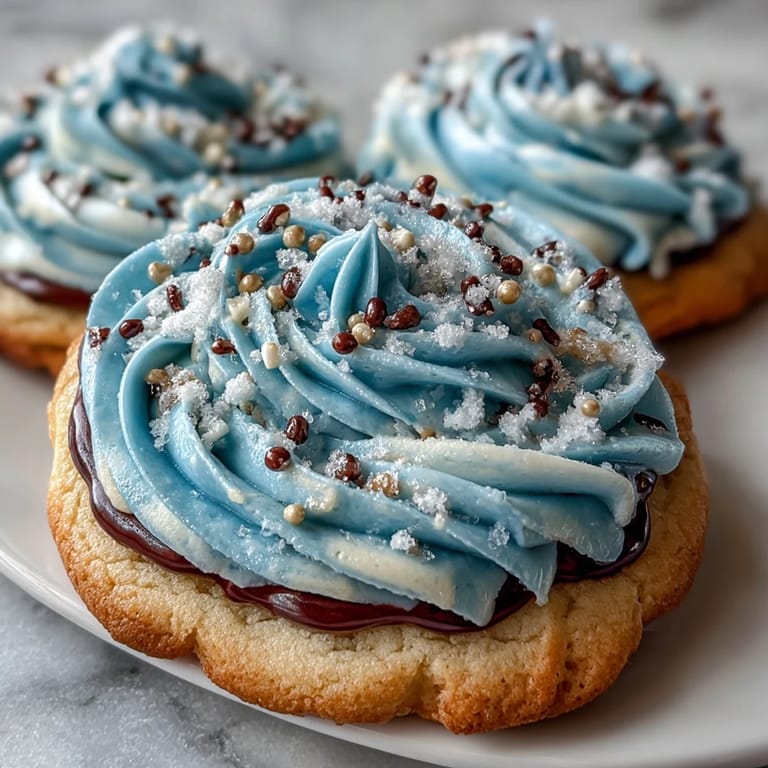
 Save to Pinterest
 There's a quiet satisfaction in watching royal icing dry on a perfectly baked sugar cookie. I spent an evening decorating a batch while listening to music, and somewhere between piping the third coat of blue icing and stepping back to admire the shimmer, I understood why people become obsessed with cookie decorating. It's meditative, creative, and the results are immediately rewarding.
Achieving That Bakery-Quality Finish
The secret to professional-looking decorated cookies isn't fancy equipment—it's understanding how royal icing behaves. When you sift your powdered sugar before mixing, you eliminate lumps that would otherwise clog your piping bag or create bumpy icing. I learned this the hard way after my first attempt produced scratchy, uneven lines. Now I sift twice: once before mixing and once after adding meringue powder. The difference is instantly visible in how smoothly the icing flows and how evenly it dries.
Timing and Temperature Matter
Baking cookies at exactly 350°F is important because too hot and the bottoms burn while the insides stay soft; too cool and they spread thin and crispy. I use an oven thermometer because most home ovens run hot or cool without their owners realizing it. Let the first batch bake while you watch, and adjust timing if needed for your specific oven. Cooling on the baking sheet for exactly five minutes lets them set just enough to transfer without breaking, but not so long that they stick.
Storage and Gifting Tips
Once the royal icing is completely hard—usually after 4-6 hours—these cookies are practically indestructible, which makes them ideal for giving away in boxes or stacking for display. I store mine in an airtight container with parchment between layers to prevent any icing transfer. They'll stay fresh at room temperature for a full week, making them perfect for preparing ahead before a party or baking as gifts.
- Stack cookies with icing facing up to show off your decorative work and prevent icing damage.
- Use small cardboard boxes lined with tissue paper for gifting, and they'll arrive looking as beautiful as the moment you finished decorating.
- If you want to freeze unbaked dough disks, wrap them tightly and they'll keep for up to three months, so you can bake fresh cookies anytime inspiration strikes.
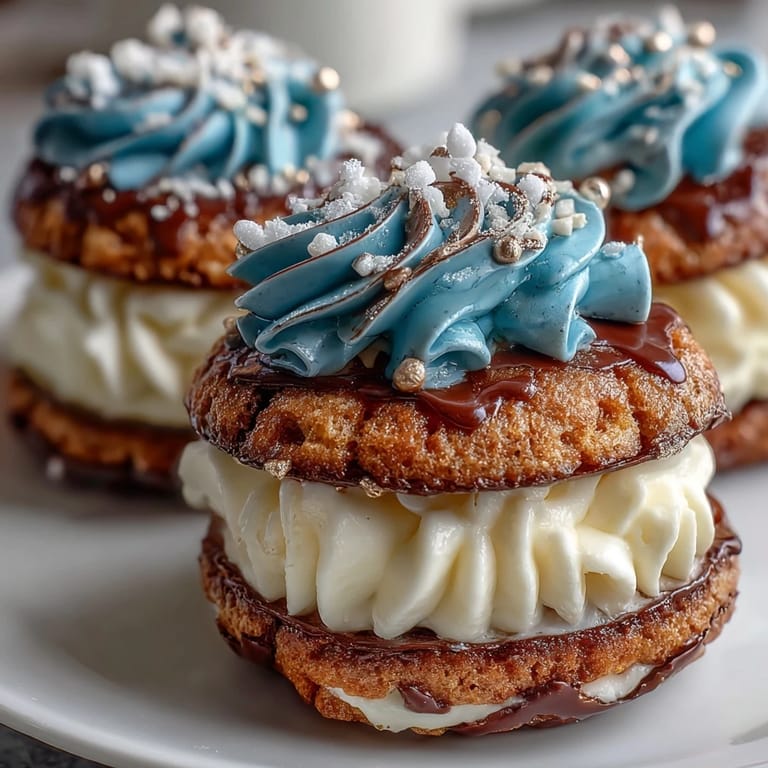
 Save to Pinterest
 These Pure Vanilla Cookie-inspired treats have become my go-to recipe for anyone with a Cookie Run Kingdom obsession, but they're equally loved by people who just appreciate beautiful, delicious vanilla cookies. There's real magic in making something handmade that connects to someone's joy, and that's what these cookies deliver every single time.
Recipe Questions & Answers
- → What makes these sugar cookies tender?
Chilling the dough before baking helps develop a tender texture and prevents spreading, resulting in perfectly shaped cookies.
- → How is the royal icing prepared?
Powdered sugar is combined with meringue powder, vanilla, and warm water then beaten until smooth and glossy, achieving a perfect consistency for decorating.
- → Can the icing colors be customized?
Yes, gel food coloring can be added to the royal icing to create vibrant decorations inspired by themed palettes.
- → How long do the cookies stay fresh?
When stored in an airtight container at room temperature, these cookies stay fresh for up to one week.
- → What tools are needed for decoration?
Basic tools include piping bags or squeeze bottles for applying the royal icing and cookie cutters for shaping the dough.