 Save to Pinterest
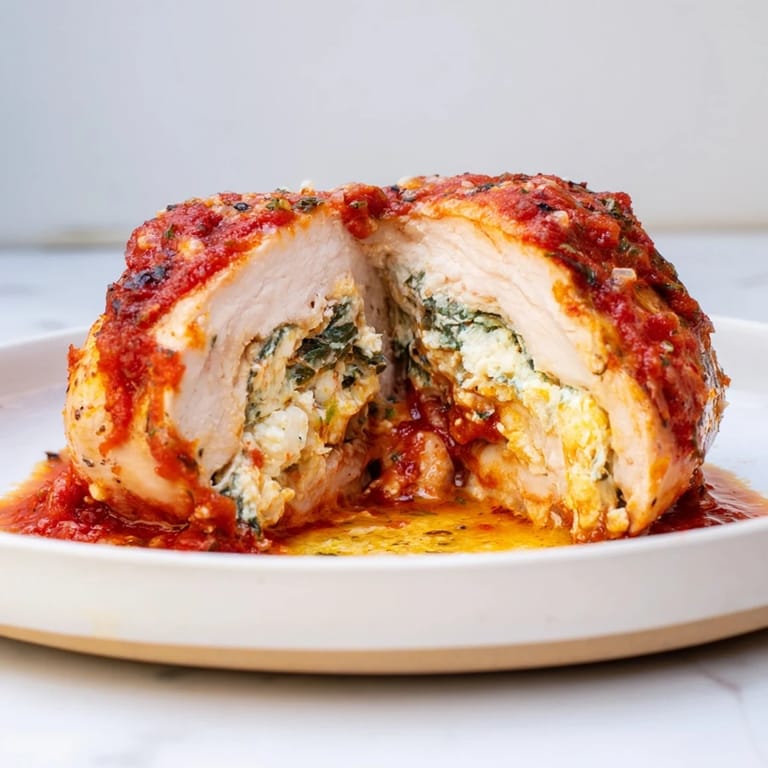
 The steam rising from the skillet, the way the ricotta oozed just slightly when I sliced into that first breast—it was one of those nights when I actually surprised myself. I'd been staring at chicken breasts and a container of ricotta for twenty minutes, convinced I'd overcomplicate it. Instead, I tucked spinach and cheese into those pockets, let them sear until golden, and watched them finish in a bubbling tomato sauce that smelled like someone else's kitchen, someone who knew what they were doing. That first bite was creamy, savory, and just enough lemon to make it interesting.
I made this for my sister's birthday dinner, and she kept asking if I'd taken a cooking class. The truth was I'd just learned to trust the pocket-cutting step and not overthink the stuffing. Watching everyone go quiet as they ate, then ask for seconds, made me realize this was the kind of dish that turns a regular Tuesday into something worth remembering. It's become my go-to when I want to cook something that feels like care on a plate.
Ingredients
- Boneless, skinless chicken breasts: Look for ones that are roughly the same size so they cook evenly, and don't be afraid to pound them gently if one's much thicker.
- Ricotta cheese: The creaminess here is everything—whole milk ricotta makes the filling luscious, though part-skim works if you want it lighter.
- Fresh baby spinach: Chop it small so it blends smoothly into the filling, and it wilts down to almost nothing, so don't skimp.
- Parmesan cheese: Freshly grated makes a difference, adding that nutty, salty depth that pre-shredded just can't match.
- Garlic cloves: Minced fine, they melt into the filling and sauce, giving everything a warm, aromatic backbone.
- Italian herbs and lemon zest: These brighten the ricotta and keep it from feeling too heavy, a little zing that makes each bite interesting.
- Crushed tomatoes: Use good quality canned ones, they simmer into a rich sauce that clings to the chicken beautifully.
- Onion: Finely chopped so it melts into the sauce, adding sweetness and body without chunks.
- Olive oil: For searing and sautéing, it brings everything together and adds a subtle fruity note.
- Oregano and sugar: The oregano gives that classic Italian flavor, and the sugar balances the acidity of the tomatoes just right.
Tired of Takeout? 🥡
Get 10 meals you can make faster than delivery arrives. Seriously.
One email. No spam. Unsubscribe anytime.
Instructions
- Preheat and Prep:
- Set your oven to 375°F and take a moment to gather everything. It's one of those recipes where having your ingredients ready makes the whole process feel smooth instead of frantic.
- Mix the Filling:
- Combine the ricotta, chopped spinach, Parmesan, garlic, Italian herbs, lemon zest, salt, and pepper in a bowl, stirring until it's creamy and flecked with green. Taste it—it should be flavorful on its own, because that's what will shine inside the chicken.
- Create the Pockets:
- Lay each chicken breast flat and carefully slice horizontally into the thickest part, creating a pocket without cutting all the way through. Season both sides with salt and pepper, and don't rush this step—it's easier than it looks once you get the angle right.
- Stuff the Chicken:
- Spoon the ricotta mixture into each pocket, pressing gently to fill it without overstuffing. If it wants to spill out, secure the edges with a toothpick or two—they'll hold everything together while it cooks.
- Sear the Chicken:
- Heat olive oil in an oven-safe skillet over medium-high heat and sear each stuffed breast for 2 to 3 minutes per side until golden and slightly crispy. This step locks in flavor and gives the chicken a beautiful color, so let it sit undisturbed while it sears.
- Build the Sauce:
- In the same skillet, add a bit more olive oil and sauté the chopped onion until soft and translucent, about 3 minutes, then toss in the garlic and let it cook for another minute. Stir in the crushed tomatoes, oregano, sugar, salt, and pepper, and let it all simmer together for 5 minutes until the sauce thickens slightly and smells amazing.
- Nestle and Bake:
- Place the seared chicken breasts right into the tomato sauce, spooning some over the tops so they stay moist. Transfer the skillet to the oven and bake uncovered for 20 to 25 minutes, until the chicken reaches an internal temperature of 165°F and the sauce is bubbling around the edges.
- Finish and Serve:
- Remove the toothpicks carefully, sprinkle with extra Parmesan or torn fresh basil if you have it, and serve hot with crusty bread or over pasta. The chicken will be tender, the filling creamy, and the sauce will beg to be soaked up with something starchy.
 Save to Pinterest
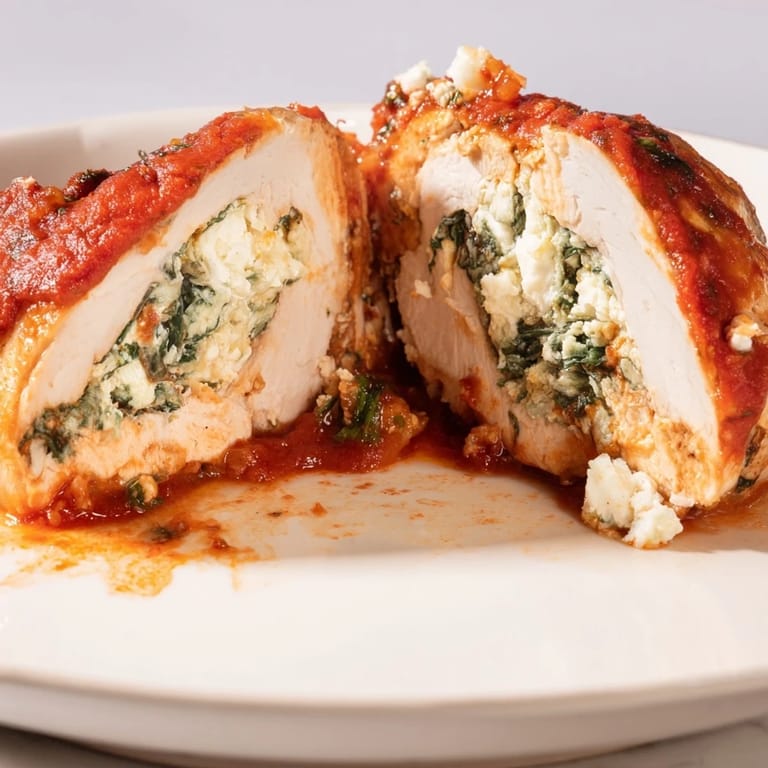
 There was a night when I served this with a cheap bottle of Pinot Grigio and some garlic bread, and my friend said it tasted like a restaurant we'd never be able to afford. I didn't tell her how simple it actually was, just smiled and poured more wine. That's the magic of this dish—it feels special without demanding perfection, and it turns an ordinary dinner into a moment people remember.
Making It Your Own
If you want a little heat, add a pinch of red pepper flakes to the tomato sauce while it simmers. I've also swapped the spinach for finely chopped kale, which holds up a bit firmer and adds a slightly earthy flavor. Some nights I've used part-skim ricotta to lighten things up, and it still tastes indulgent without feeling heavy. Don't be afraid to play with the herbs—fresh basil or a bit of thyme in the filling can change the whole vibe.
Serving and Pairing
This chicken begs for something to soak up the sauce, so I usually serve it with crusty bread torn into big pieces or spooned over a tangle of al dente pasta. A simple arugula salad with lemon and olive oil on the side keeps things fresh and cuts through the richness. If you're pouring wine, a crisp white like Pinot Grigio works beautifully, though a light-bodied red like Chianti is just as good if that's what you're craving. It's the kind of meal that feels complete without needing much else.
Storage and Reheating
Leftovers keep well in an airtight container in the fridge for up to three days, and honestly, they taste even better the next day once the flavors have melded. Reheat gently in a covered skillet with a splash of water or broth to keep the chicken moist, or pop it in the oven at 350°F until warmed through. I've even sliced the chicken and tucked it into a sandwich with some of the sauce and fresh mozzarella, which turned lunch into something I looked forward to all morning.
- Let the chicken rest for a few minutes after baking so the juices redistribute and every bite stays tender.
- If you're meal prepping, you can stuff the chicken a day ahead and keep it covered in the fridge until you're ready to sear and bake.
- Always check the internal temperature with a meat thermometer to avoid overcooking, because nobody wants dry chicken.
 Save to Pinterest
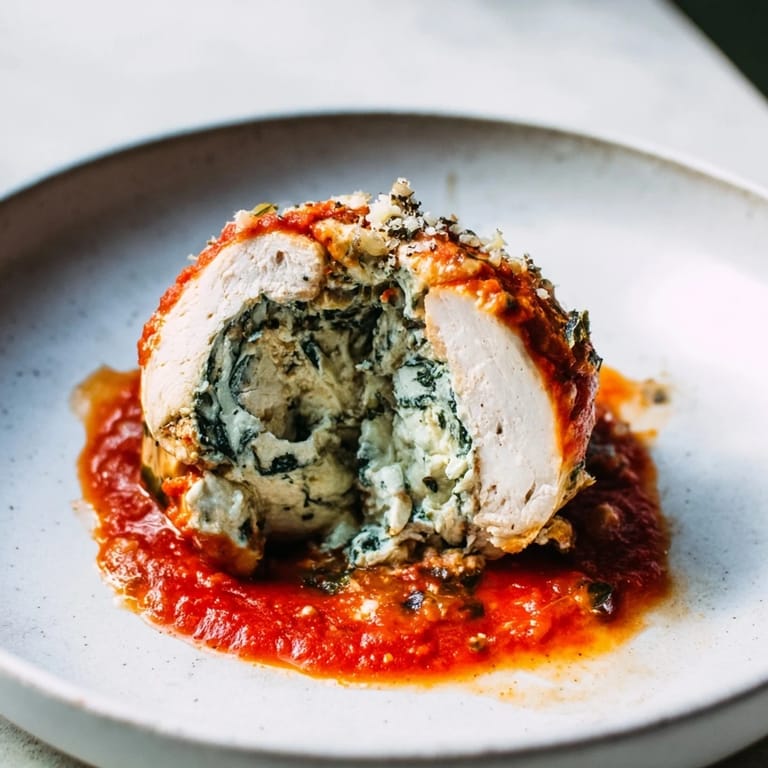
 This is the kind of recipe that makes you feel like you've got your life together, even on nights when you don't. It's comforting, impressive, and forgiving, and it always delivers that warm, satisfied feeling that good food should. I hope it becomes one of those dishes you reach for when you want to feed the people you care about, or just treat yourself to something special.
Recipe Questions & Answers
- → How do I prevent the chicken from drying out while baking?
Sear the stuffed chicken breasts in the skillet first to create a golden crust that locks in moisture. Additionally, nestling them into the tomato sauce during baking keeps them moist. Avoid overcooking by checking the internal temperature reaches exactly 165°F (74°C).
- → Can I prepare this dish ahead of time?
Yes, you can stuff the chicken breasts up to 4 hours ahead and refrigerate them covered. When ready to cook, add a few extra minutes to the searing step as they'll be cold. The assembled dish can also be prepared through step 8 and baked when needed.
- → What are good side dishes to serve with this?
Crusty bread works wonderfully to soak up the tomato sauce. Alternatively, serve over pasta, alongside roasted vegetables like zucchini and bell peppers, or with a fresh green salad. A crisp Pinot Grigio or light red wine pairs beautifully with the flavors.
- → How should I secure the opening if toothpicks aren't available?
Kitchen twine works as an excellent alternative to toothpicks. Simply tie the opening closed with a knot and remove before serving. You can also create a pocket carefully enough that the filling stays intact without securing, though toothpicks or twine provide extra assurance.
- → Is this suitable for a gluten-free diet?
Yes, this dish is naturally gluten-free as written since it contains no wheat products. However, always verify ingredient labels on processed items like canned tomatoes, as some brands may have additives. Serve with gluten-free bread if desired for a complete meal.
- → Can I make substitutions to the filling ingredients?
Absolutely. Kale or arugula can replace spinach for different flavors. Use part-skim ricotta for a lighter version, or substitute mascarpone for creamier richness. Fresh basil can replace some Italian herbs, and you can adjust the Parmesan to taste preferences.