 Save to Pinterest
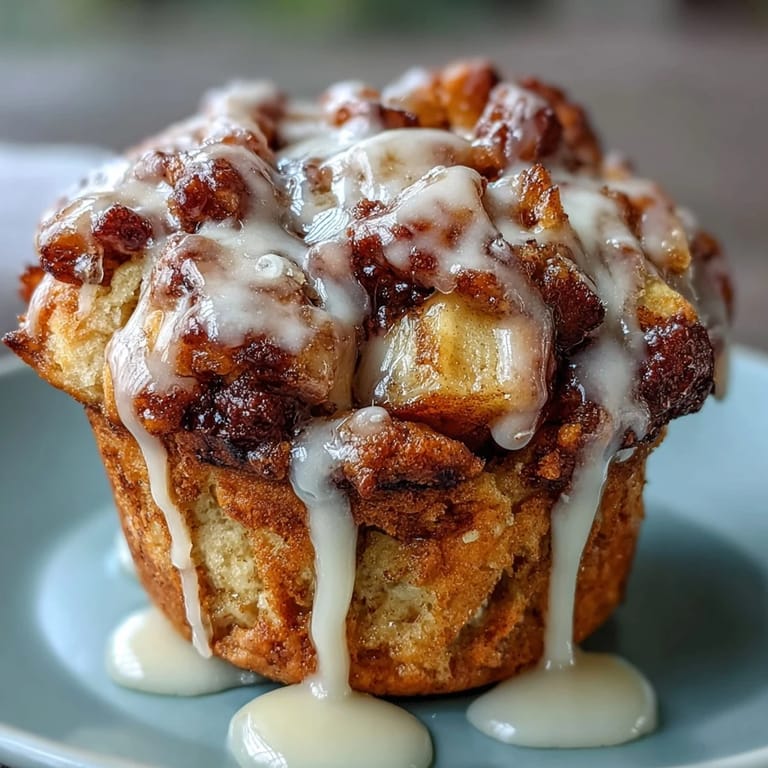
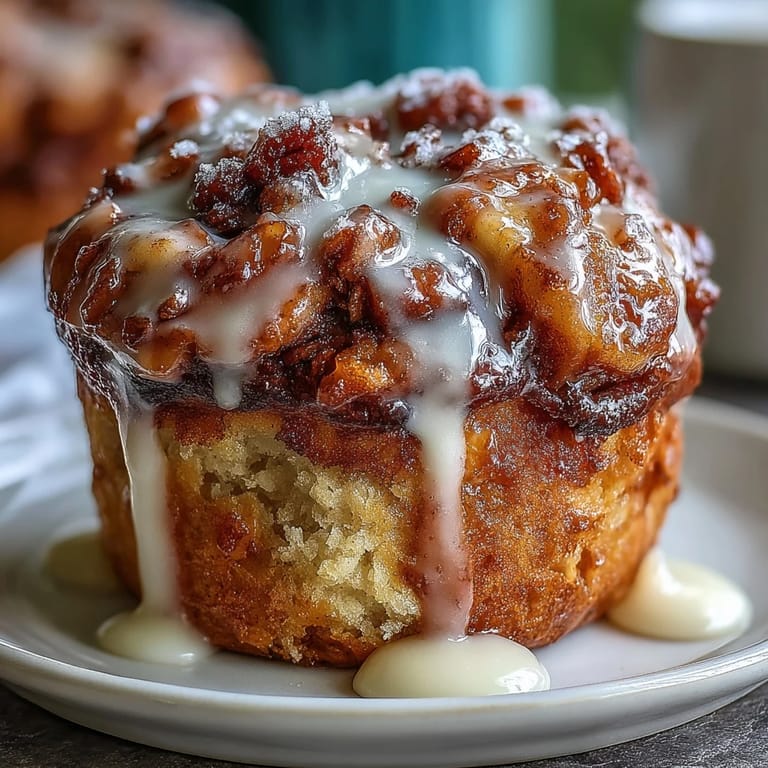
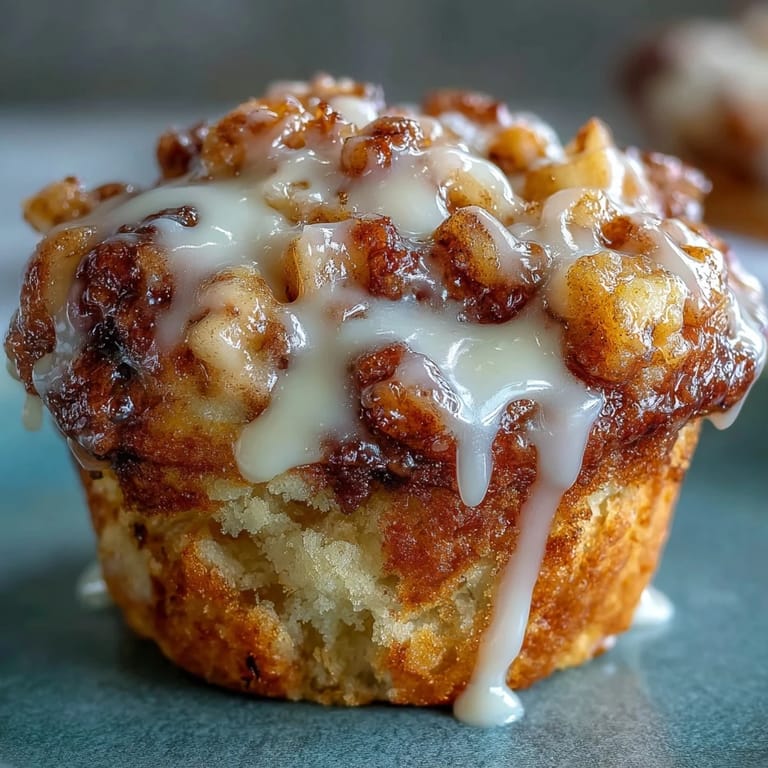
 There's something about early autumn mornings that makes me crave apple fritter muffins, but honestly, it started when my neighbor handed me one through the kitchen window while I was watering plants on a random Tuesday. The smell alone—that warm cinnamon mixed with buttery apples—made me stop everything and ask for the recipe right then. What struck me most was how she'd managed to capture that deep-fried fritter magic without any of the oil mess, just a simple muffin tin and a drizzle of glaze that made it feel like dessert.
I brought these to a potluck once and watched them disappear before anyone even touched the savory dishes, which says something. A coworker actually asked if I'd bought them from a bakery, and I'm still riding that high a year later. There's a quiet joy in feeding people something that tastes like you spent hours on it when really you just folded some apples into batter and walked away.
Ingredients
- Apples (2 large, Granny Smith or Honeycrisp): Granny Smiths give you that tart bite that balances the brown sugar perfectly, though Honeycrisps work if you prefer something sweeter and juicier—just know your apples will shed a bit more liquid, which is fine.
- All-purpose flour (2 cups): Don't sift it unless you're feeling fancy; spoon it into your measuring cup and level it off, and you'll get tender muffins every time.
- Brown sugar (3/4 cup, packed): Pack it down in the measuring cup like you mean it—this is where the moisture and deep flavor come from.
- Baking powder (2 teaspoons): This is your rising agent; make sure it's fresh because stale baking powder won't give you that tender crumb.
- Ground cinnamon (1 1/2 teaspoons): This is generous but worth it; cinnamon is what makes these feel like a special breakfast moment.
- Salt (1/2 teaspoon): A small amount that makes every flavor pop and keeps sweetness from feeling flat.
- Eggs (2 large): These bind everything and add richness; room temperature eggs mix in more smoothly, though cold ones work fine.
- Milk (1/2 cup): Any milk works, but whole milk creates a richer, more tender crumb than skim.
- Unsalted butter (1/4 cup, melted): Melted butter incorporates instantly and keeps the muffins tender; let it cool for a minute before whisking with eggs.
- Vanilla extract (1 teaspoon): A small amount that rounds out the flavor and adds warmth without announcing itself.
- Powdered sugar (2 tablespoons): This becomes your glaze base; sift it if you have clumps, though honestly most of us just whisk it out.
Tired of Takeout? 🥡
Get 10 meals you can make faster than delivery arrives. Seriously.
One email. No spam. Unsubscribe anytime.
Instructions
- Set your oven and prepare:
- Preheat to 350°F and either grease a 12-cup muffin tin with butter or line it with paper liners—paper liners make cleanup effortless and let you peel them away while eating warm muffins. This takes two minutes but saves you from burnt fingers later.
- Combine your dry team:
- Whisk together flour, brown sugar, baking powder, cinnamon, and salt in a large bowl, making sure the baking powder and cinnamon distribute evenly so every muffin gets that consistent flavor. A whisk is worth it here because it aerates and breaks up any brown sugar clumps.
- Build the wet mixture:
- In another bowl, whisk eggs, milk, melted butter, and vanilla until they look smooth and combined. This usually takes about 30 seconds of actual whisking; you're not making whipped cream.
- Fold everything together:
- Pour the wet ingredients into the dry ingredients and use a rubber spatula to fold gently—about 10 to 15 folds—until you see no dry flour streaks. Overmixing is the enemy here; stop while there are still tiny flour pockets and it'll result in tender muffins instead of dense hockey pucks.
- Introduce the apples:
- Gently fold in the diced apples until they're scattered throughout, which takes only a few folds since you don't want to break them down. The batter will look chunky and rustic, which is exactly what you want.
- Fill the muffin tin:
- Divide the batter evenly using an ice cream scoop or spoon, filling each cup about two-thirds full so they rise nicely without spilling over. If you fill them to the brim, you'll get muffin tops that escape the tin (delicious but messy).
- Bake until golden:
- Bake for 20 to 25 minutes; you'll know they're done when the tops are golden and a toothpick inserted into the center comes out clean or with just a few moist crumbs. The kitchen will smell incredible by minute 15.
- Cool with patience:
- Let the muffins sit in the pan for 5 minutes (this helps them set), then transfer them to a wire rack to cool completely. Warm muffins are delicate, so this brief resting period prevents them from crumbling when you pick them up.
- Make the glaze:
- Whisk powdered sugar with 1 tablespoon milk until smooth, adding a tiny splash more milk if it's too thick—you want it to drizzle, not pour. A thick glaze that slowly flows off a spoon is what you're after.
- Finish with the drizzle:
- Once the muffins are completely cooled, drizzle the glaze over the tops in thin lines; it'll set as it sits, creating that bakery-style finish. Some people get artistic with patterns, but honestly, messy drizzles taste just as good.
 Save to Pinterest
 There's a moment when you pull these out of the oven and the glaze catches the light that makes you feel like a real baker, even if you've never baked before. My seven-year-old nephew actually said they were better than the bakery ones his mom usually buys, which changed my entire Monday.
Storage and Make-Ahead Magic
These muffins keep at room temperature in an airtight container for three days, and they're honestly just as good on day three as day one—maybe even better because the flavors settle. I've grabbed one cold from the fridge at midnight more times than I care to admit, and there's something deeply satisfying about that.
Ways to Make Them Your Own
The beauty of this recipe is that it welcomes additions without fighting back, so play around. I've tried nutmeg for warmth, toasted walnuts for crunch, and even a cream glaze instead of milk when I was feeling fancy—all of them worked beautifully.
Freezing and Thawing Tips
If you want to make a batch ahead, these freeze beautifully for up to two months in an airtight container or freezer bag. Just thaw them at room temperature and glaze them fresh, which feels like having a baker's secret stash waiting in your freezer.
- Freeze the baked muffins before glazing for the best results and longest shelf life.
- You can also freeze the unbaked batter in muffin liners and bake them straight from frozen, adding just 5 to 8 extra minutes to the baking time.
- Thawed muffins taste fresher if you give them a minute in a 300°F oven to warm through, which revives that just-baked texture.
 Save to Pinterest
 These apple fritter muffins have become my casual gift to neighbors, my emergency breakfast when guests arrive unexpectedly, and my proof that homemade doesn't have to be complicated. Make them once and you'll understand why my neighbor couldn't keep quiet about them.
Recipe Questions & Answers
- → How do I prevent the muffins from becoming dry?
Ensure not to overmix the batter and bake just until a toothpick inserted comes out clean, typically around 20–25 minutes.
- → Can I substitute apples with another fruit?
Yes, diced pears or peaches can be used, though texture and sweetness will vary slightly.
- → What is the purpose of the powdered sugar glaze?
The glaze adds a sweet finish and a hint of moisture, enhancing both flavor and appearance.
- → Can I add nuts to the muffins?
Absolutely, chopped walnuts or pecans can be stirred into the batter for added crunch and flavor.
- → How should the muffins be stored for best freshness?
Keep them in an airtight container at room temperature for up to three days to maintain softness.