 Save to Pinterest
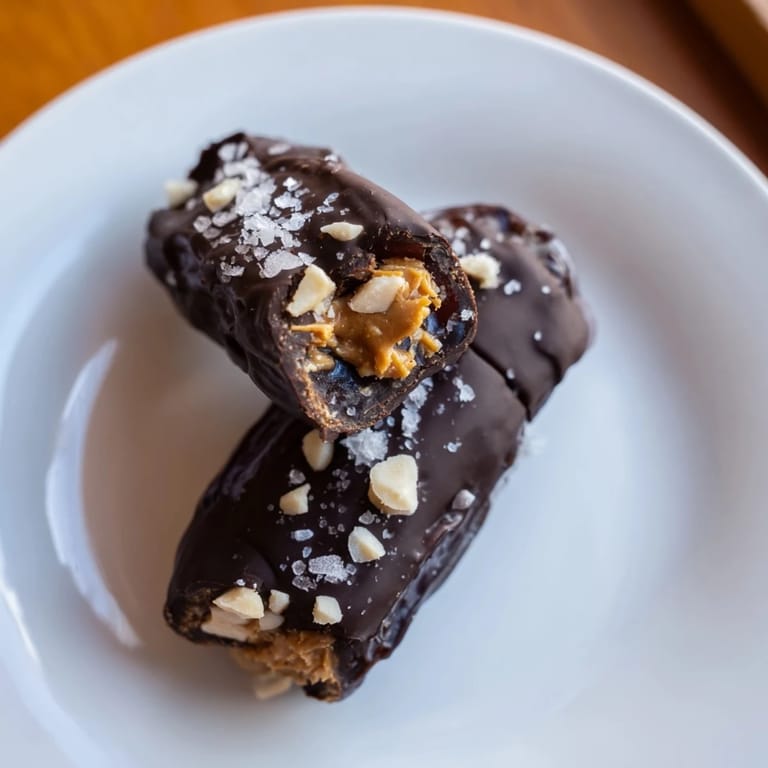
 There's something about the moment when you bite into one of these and the chocolate cracks, revealing that jammy date and creamy peanut butter center—it's like a little celebration in your mouth. I discovered this recipe on a quiet afternoon when I was tired of candy that tasted like regret, and wanted something that felt indulgent but also made me feel good about what I was eating. These came together so easily that I couldn't believe I'd been buying expensive candy bars for years when I could make something better in my kitchen. The beauty of it is how it bridges two worlds: the nostalgia of a Snickers bar with the clean simplicity of whole dates and real peanut butter. Now they're my go-to when I need something sweet that actually tastes like food.
I made a batch of these for a friend who'd been stressed about staying healthy while still enjoying dessert, and watching her face light up when she realized how good they tasted was everything. She called me the next day asking if I could make them again because she'd already eaten half the batch, and that's when I knew I'd created something worth keeping in regular rotation. It became our little inside joke—the candy that tastes sinful but actually nourishes you.
Ingredients
- Large Medjool dates, pitted (12): These are the MVP of the recipe—plump, naturally sweet, and have that perfect chewy texture that mimics real candy. I learned to always buy the best quality dates you can find because they're the star here, not a supporting player.
- Creamy peanut butter (6 tablespoons): Use the kind with just peanuts and salt, no added oils or sweeteners, because you want the real peanut flavor to shine through and complement the date's natural sweetness.
- Roasted unsalted peanuts, roughly chopped (3 tablespoons): These chunks give you that satisfying crunch that makes each bite interesting; don't skip them even though they're optional in some versions.
- Dark chocolate, chopped (200 g / 7 oz, at least 60% cocoa): The cocoa percentage matters more than you'd think—anything less than 60% tastes waxy, while 70% or higher gives you real chocolate depth that balances the sweetness of the dates.
- Coconut oil, optional (1 tablespoon): This tiny amount makes the chocolate smoother and easier to work with, preventing it from becoming thick and stubborn when it cools; I always use it because the difference is noticeable.
- Flaky sea salt for topping (optional): Don't underestimate this pinch of salt—it wakes up the chocolate and makes the whole thing taste more sophisticated.
Tired of Takeout? 🥡
Get 10 meals you can make faster than delivery arrives. Seriously.
One email. No spam. Unsubscribe anytime.
Instructions
- Open and prepare your dates:
- Slice each date lengthwise on one side and gently pry it open to create a little pocket for the filling. You'll feel the pit pop out, and then you have a little boat ready for peanut butter. Take a breath—this part goes faster than you'd expect once you get into a rhythm.
- Build the filling:
- Spoon about half a tablespoon of peanut butter into each date pocket, then scatter a few pieces of chopped peanuts on top. Press the date gently closed so the filling stays tucked inside but isn't spilling everywhere. The goal is stuffed but not bursting.
- Set up your chocolate station:
- Line a baking sheet with parchment paper so you have a clean landing spot for your chocolate-covered dates. This small setup makes cleanup easier and prevents sticking later.
- Melt the chocolate gently:
- Combine your chopped chocolate and coconut oil in a microwave-safe bowl, then heat in 30-second bursts, stirring between each one until completely smooth. Patience here prevents burned chocolate, which tastes bitter and ruins the whole batch.
- Coat each date in chocolate:
- Using a fork, dip each stuffed date into the warm chocolate, turning it to coat all sides, then let the excess chocolate drip off before setting it on your prepared sheet. You want a good coating but not a thick shell that overshadows the date inside.
- Add salt if using:
- While the chocolate is still wet and pliable, sprinkle a small pinch of flaky sea salt over the top of each piece. The chocolate needs to still be tacky or the salt will slide right off.
- Chill and set:
- Pop the whole sheet in the refrigerator for 10 to 15 minutes until the chocolate hardens completely. You can eat them cold straight from the fridge or let them sit at room temperature for a softer, more peanut buttery texture.
 Save to Pinterest
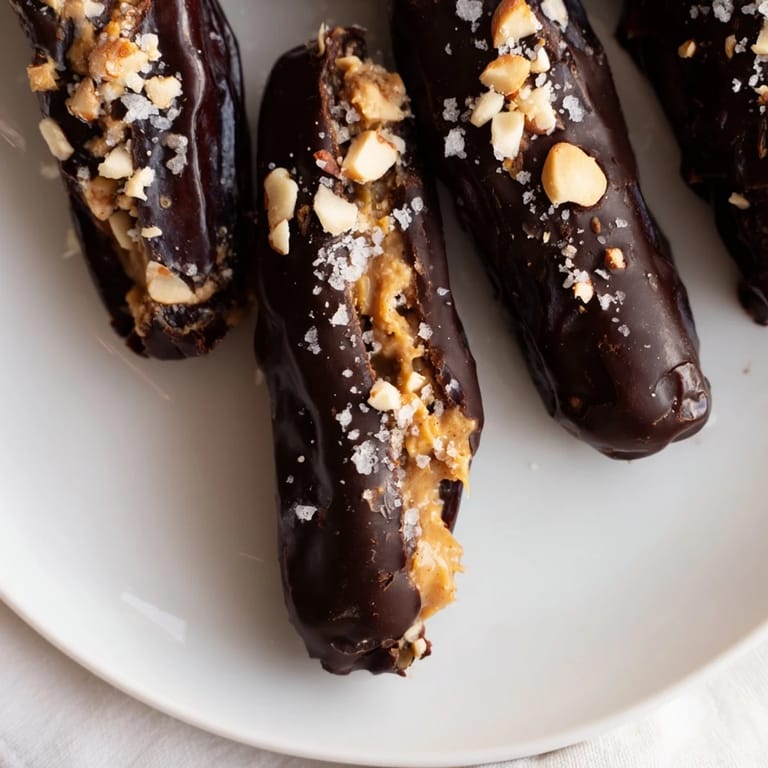
 There's something quietly magical about transforming simple ingredients into candy that makes people pause and actually taste what they're eating instead of just consuming. These little bites became the thing I bring to potlucks and holiday gatherings, and somehow they disappear faster than anything else on the table.
Flavor Variations to Try
The basic formula is flexible, and playing with it is half the fun. I've swapped the peanut butter for almond butter and suddenly it tastes more elegant and refined, or used cashew butter for something creamier and more subtle. For a completely nut-free version that still has that crunch, sunflower seed butter with pumpkin seeds works beautifully and tastes oddly sophisticated. The dark chocolate is the anchor, but if you're feeling adventurous, half dark and half milk chocolate creates a sweeter, more approachable flavor that might hook people who usually don't go for bitter chocolate.
How to Store and Serve Them
These keep beautifully in an airtight container in the refrigerator for up to a week, though they rarely last that long in my house. If you make a big batch and want them to last longer, you can freeze them for up to three weeks and just pull them out as needed. They're perfect on their own, but I've discovered they're even better alongside a cup of strong coffee or cold milk, which somehow makes the whole experience feel like a proper dessert moment instead of a quick snack.
Why These Win Over Store-Bought Candy
There's a real difference between this and a commercial candy bar, and I'm not just talking about the lack of artificial ingredients. Homemade means you control the chocolate quality, you know exactly what's in the filling, and you get to eat something that tastes like actual food instead of a formula optimized for shelf stability. Plus there's something satisfying about creating candy in your own kitchen—it feels like a small act of self-care, like you're telling yourself you're worth the effort.
- These are impressive enough to gift in a little box or bag, which costs almost nothing but feels thoughtful and personal.
- Make a double batch if you're having friends over because they disappear faster than you'd expect.
- If you want to get fancy, you can dust them with a tiny bit of cocoa powder or finely chopped peanuts before the chocolate sets completely.
 Save to Pinterest
 These chocolates prove that the most satisfying treats don't need to be complicated or full of ingredients you can't pronounce. Every time I make a batch, I'm reminded that good food is really just about respecting your ingredients and taking a little time to put them together with care.
Recipe Questions & Answers
- → What type of dates work best?
Large Medjool dates are ideal due to their soft texture and natural sweetness, making them perfect for stuffing and coating.
- → Can I substitute peanut butter with other spreads?
Yes, almond or cashew butter can be used for a different flavor, and sunflower seed butter offers a nut-free alternative.
- → How do I achieve a smooth chocolate coating?
Melting dark chocolate with a bit of coconut oil helps create a smooth and glossy coating that adheres well to the dates.
- → Is chilling necessary after coating?
Yes, refrigerating for 10–15 minutes helps the chocolate set firmly, making the treats easier to handle and enjoy.
- → How should these treats be stored?
Store them in an airtight container in the refrigerator for up to one week to maintain freshness and texture.