 Save to Pinterest
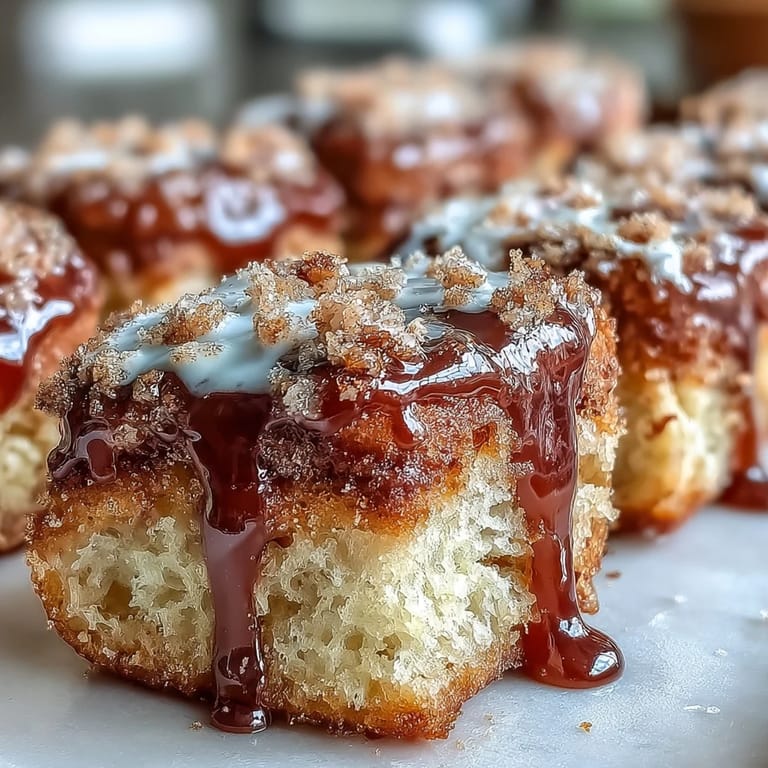
 My apartment building had this tiny Saturday morning tradition where neighbors would swap baked goods across doorways, and the maple donut bars from 3B became absolute legend. After weeks of subtle questioning and hallway small talk, Mrs. Henderson finally slipped me a crumpled index card with her recipe, laughing that she'd been making these since her wedding in 1978. The first time I made them, the whole floor seemed to materialize outside my kitchen door, following that unmistakable warm maple scent that somehow bypassed logic and went straight to neighbor instinct.
Last autumn my sister came over after a particularly brutal week at her new job, and I pulled these fresh from the oven without saying a word. She took one bite of that still-wonglazed bar and actually teared up, saying it tasted exactly like our grandmother's kitchen where everything felt possible and Sunday mornings lasted forever. Now she texts me from three states away whenever she needs 'that maple feeling,' and I honestly believe these bars have some kind of emotional superpower.
Ingredients
- 2 cups all-purpose flour: The foundation that gives these bars their tender cake-like crumb
- 1 cup granulated sugar: Sweetens the batter while creating a delicate golden crust
- 1 tablespoon baking powder: Ensures these puff up beautifully with that signature donut fluffiness
- 1/2 teaspoon salt: Balances sweetness and enhances all the warm spices
- 1/2 teaspoon ground cinnamon: Adds cozy warmth that pairs perfectly with maple
- 1/4 teaspoon ground nutmeg: A subtle background note that makes people ask what's your secret
- 1/2 cup unsalted butter melted: Creates incredible richness and keeps bars moist for days
- 1 cup whole milk: The key to achieving that soft bakery-style texture
- 2 large eggs: Provides structure and helps the bars rise evenly
- 1 teaspoon vanilla extract: Rounds out the maple flavor with sweet depth
- 1/2 cup maple syrup: The star ingredient that infuses every bite with authentic maple flavor
- 1 cup powdered sugar: Creates the perfect thick glossy glaze consistency
- 1-2 tablespoons milk: Adjust glaze thickness to your preference
- 2 tablespoons maple syrup: Infuses the glaze with that unmistakable maple essence
- Extra maple syrup: For drizzling over the top because more maple is always better
Tired of Takeout? 🥡
Get 10 meals you can make faster than delivery arrives. Seriously.
One email. No spam. Unsubscribe anytime.
Instructions
- Get your oven ready:
- Preheat to 350°F and grease a 9×13 inch pan, though parchment paper makes cleanup ridiculously easy
- Whisk the dry ingredients:
- Combine flour, sugar, baking powder, salt, cinnamon, and nutmeg in a large bowl until everything's evenly distributed
- Mix the wet ingredients:
- In another bowl, whisk melted butter, milk, eggs, vanilla, and maple syrup until completely smooth
- Combine carefully:
- Pour wet into dry and fold gently just until combined—overmixing makes these tough and nobody wants that
- Spread and bake:
- Even the batter in your prepared pan and bake 25-30 minutes until golden and a toothpick comes out clean
- Cool completely:
- Let them rest 10 minutes in the pan, then move to a wire rack because patience prevents a runny glaze disaster
- Make the glaze:
- Whisk powdered sugar with 1 tablespoon milk, adjusting until thick but pourable, then stir in the maple syrup
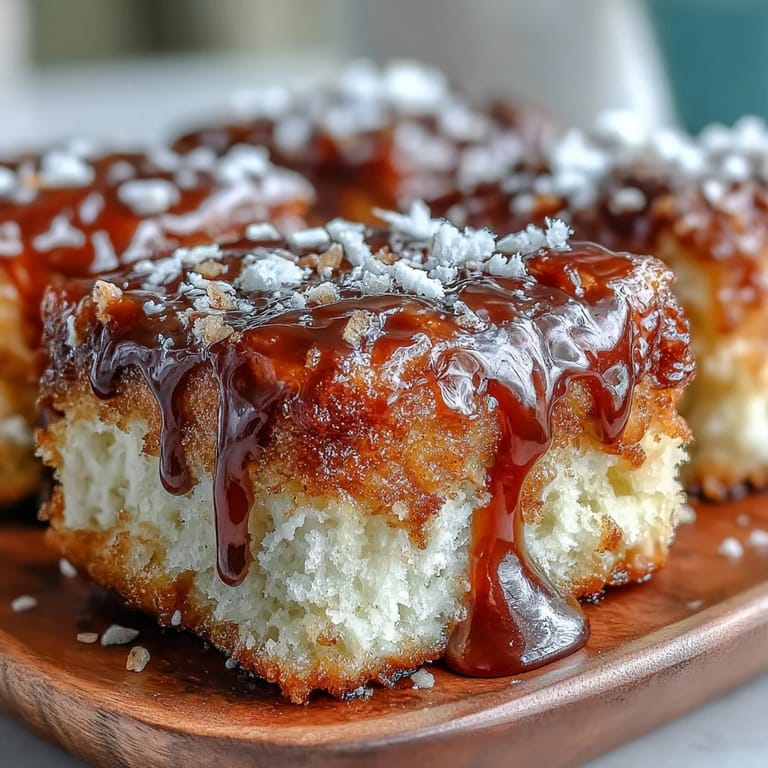
- Glaze like a pro:
- Drizzle that beautiful maple frosting all over the completely cooled bars and add extra syrup if you're feeling fancy
- Set and slice:
- Wait 10-15 minutes for the glaze to firm up, then cut into squares and try not to eat them all immediately
 Save to Pinterest
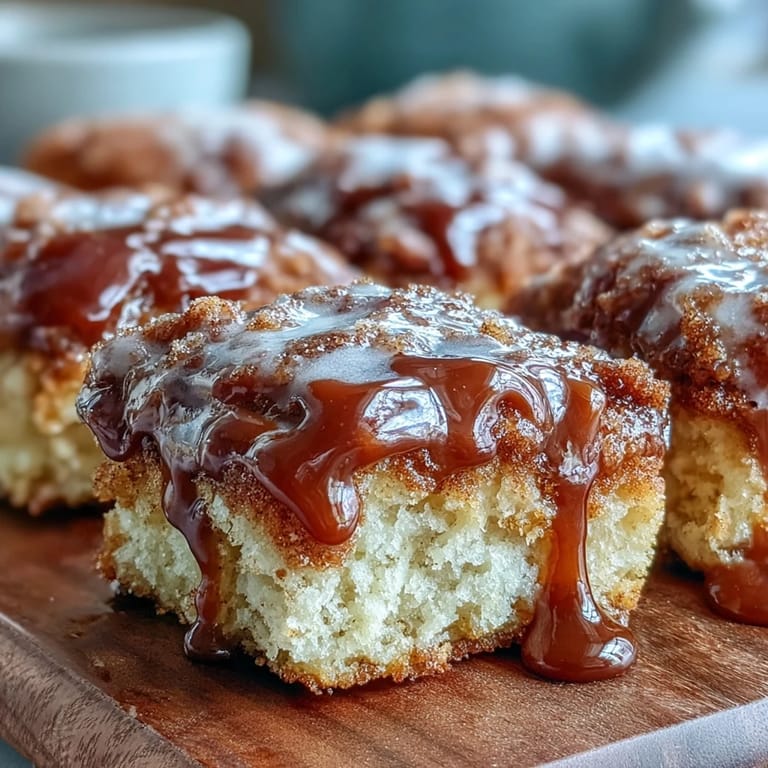
 My dad claims he doesn't have a sweet tooth, but I've watched him sneak back to the kitchen four times in one evening for 'just one more square' of these maple bars. There's something about that combination of warm spices and pure maple flavor that transforms ordinary moments into something that feels like home, whether it's a rainy Tuesday morning or a holiday breakfast table.
Making These Ahead
I've learned through trial and error that these maple donut bars actually taste better the next day, giving the flavors time to deepen and the texture to become even more tender. Store them in an airtight container at room temperature and they'll stay perfectly moist for up to three days—though in my house, they've never made it past day two.
Glaze Consistency Secrets
The perfect maple glaze should be thick enough to coat the back of a spoon but thin enough to pour in those beautiful ribbons across the bars. I start with one tablespoon of milk and add the second only if needed, whisking constantly until smooth—you want something that slowly drips off a spoon, not runs off like water.
Serving Suggestions
Warm these slightly in the microwave for 10 seconds and serve with a cold glass of milk for the ultimate comfort snack. They're also incredible alongside a hot cup of coffee, the way the maple flavor blooms against the bitterness is absolutely magical.
- Top with chopped toasted pecans for crunch that takes these over the top
- Add a sprinkle of sea salt to the glaze for that salted maple effect everyone loves
- These freeze beautifully if you want to stash some for emergency comfort food
 Save to Pinterest
 These maple donut bars have become my go-to for everything from school bake sales to comforting friends who just need something sweet and familiar.
Recipe Questions & Answers
- → Can I make these bars ahead of time?
Yes! These bars keep beautifully in an airtight container at room temperature for up to 3 days. The glaze stays soft and the texture remains fresh. You can also freeze unglazed bars for up to 2 months and add the glaze after thawing.
- → Why did my bars turn out dense?
Overmixing the batter can develop too much gluten, leading to dense bars. Gently fold the wet and dry ingredients together until just combined—some small lumps are fine. Also ensure your baking powder is fresh for proper lift.
- → Can I substitute the maple syrup?
Honey works as a substitute, though the flavor profile will change. For the closest maple flavor without real maple syrup, use maple extract with honey or brown sugar. Keep in mind that the glaze consistency may need slight adjustment with alternative sweeteners.
- → How do I know when the bars are done baking?
Insert a toothpick into the center of the bars—it should come out clean or with just a few moist crumbs. The edges should be lightly golden, and the top should spring back when gently pressed. Start checking at 25 minutes to avoid overbaking.
- → Can I make these gluten-free?
Yes, substitute the all-purpose flour with a 1:1 gluten-free flour blend that includes xanthan gum. The texture may be slightly denser but still delicious. Ensure all other ingredients, including baking powder, are certified gluten-free.
- → What's the best way to glaze these bars?
Let the bars cool completely before glazing, or the glaze will melt and run off. Whisk the powdered sugar and milk until smooth, then stir in the maple syrup. The glaze should be thick but pourable—if too thick, add milk teaspoon by teaspoon.